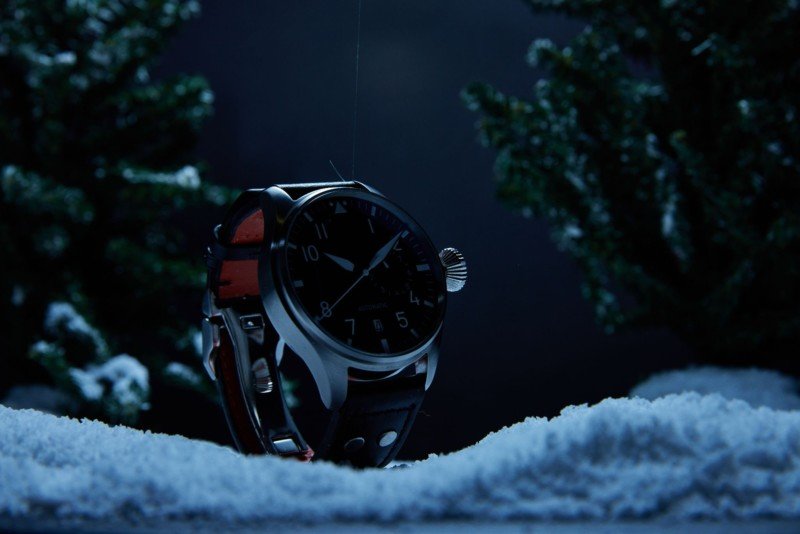
When it comes to photography, depth refers to the balance of what is in and out of focus. The right depth creates a sense of space and helps draw the viewer in, and adding depth to your product photography will help the product pop. The easiest way to achieve it is with a foreground, middle ground, and background element — and you can harness these elements with the power of lighting.
I used lighting to create depth in these images with three steps. First, I used a Profoto D2 with 10-degree grids and a 1/4 CTB gel over the top as my most powerful light. This created a backlit, moonlight-like feel, which provided separation and shape to the product:
![]()
The second light has my favorite product photography modifier on it: the Profoto ProBox. This sweet little gadget provides perfect edge-to-edge lighting which allows the photographer to dial in the exact specular highlights that they want with almost immediate falloff.
Now, some might go for a DIY solution, as a piece of plexiglass and some cinefoil could get you pretty close to this effect. To get it right would just take some creative engineering and grip work to dial it in. The major downside is if you accidentally touch your product, the highlights would completely change and you would have to start your work all over again and, as we all know, on set, time is money.
![]()
The last light is another Profoto D2 with a 20-degree grid through a reflector cone and shot through a piece of translum which provides a fill. Translum is an opaque, plastic-like substance that you can bend and shape to make custom modifiers on the fly. I highly suggest picking up a roll and playing with it to see what you can create.
![]()
This is what all the lights look like when combined:
![]()
This photo on its own isn’t bad, but the large black void in the background makes the image fall flat. I shot this photo with the intention of beefing it up in post with a program called Optics from Boris FX. I had just started playing around with it, and I wanted to see what it would look like if I shot something with the intention of using special effects, and Optics didn’t disappoint.
![]()
With this software, I was able to render a realistic Aurora, starscape, lens flare, and color grade within a matter of minutes, which are just some of the basic ways of using this software. I’m excited to do a deeper dive in and see what else I can come up with.
For greater details on the process I’ve outlined here, make sure to watch the video above.
About the author: Mark Fore is a Product and Lifestyle photographer based in Oakland CA, you can see his full portfolio on his website or check out his Instagram.
