
In photography, knowing when to put the camera away is a valuable skill. Really dark situations are particularly difficult: without supplemental lighting, you can crank up the ISO to boost the camera’s light sensitivity, but that risks introducing too much distracting digital noise in the shot. Well, that was my thinking until recently. I now make photos I previously wouldn’t have attempted because of de-noise software, fueled by machine learning technology. A high ISO is no longer the compromise that it once was.
That opens up a lot of possibilities for photographers. Perhaps your camera is a few years old and doesn’t deal with noise as well as newer models. Maybe you have images in your library that you wrote off as being too noisy to process. Or you may need extremely fast shutter speeds to capture sports or other action. You can shoot with the knowledge that software will give you extra stops of exposure to play with.
Sensor sensibility
Too frequently, I run into the following circumstances. In a dark situation, I increase the ISO so I can use a fast enough shutter speed to avoid motion blur or camera shake. The higher ISO ekes out light from the scene by sending more power to the image sensor, boosting its light sensitivity. That power boost, however, introduces visible noise into the image. At higher ISO values—6400 and higher, depending on the camera—the noise can be distracting and hide detail.
The other common occurrence is when I forget to turn the ISO back down after shooting at night or in the dark. The next day, in broad daylight, I end up with noisy images and unusually fast shutter speeds because the camera is forced to adapt to so much light sensitivity. If I’m not paying attention to the values while shooting, it’s easy to miss the noise by just looking at previews on the camera’s LCD. Has this happened to some of my favorite images? You bet it has.
Incidentally, this is one of those areas where buying newer gear can help. The hardware and software in today’s cameras handle noise better than in the past. My main body is a four-year-old Fujifilm X-T3 that produces perfectly tolerable noise levels at ISO 6400. That has been my ceiling for setting the ISO, but now (depending on the scene of course) I’m comfortable pushing beyond that.
The sound of science
Noise-reduction editing features are not new, but the way we deal with noise has changed a lot in the past few years. In many photo editing apps, the de-noising controls apply algorithms that attempt to smooth out the noise, often resulting in overly soft results.
A more effective approach is to use tools built on machine learning models that have processed thousands of noisy images. In “Preprocess Raw files with machine learning for cleaner-looking photos,” I wrote about DxO PureRAW 2, which applies de-noising to raw files when they’re demosaiced.
If you’re working with a JPEG or HEIC file, or a Raw file that’s already gone through that processing phase, apps such as ON1 NoNoise AI (which is available as a stand-alone app/plug-in and also incorporated into ON1 Photo RAW) and Topaz DeNoise AI analyze the image’s noise pattern and use that information to correct it.
Testing various de-noise software

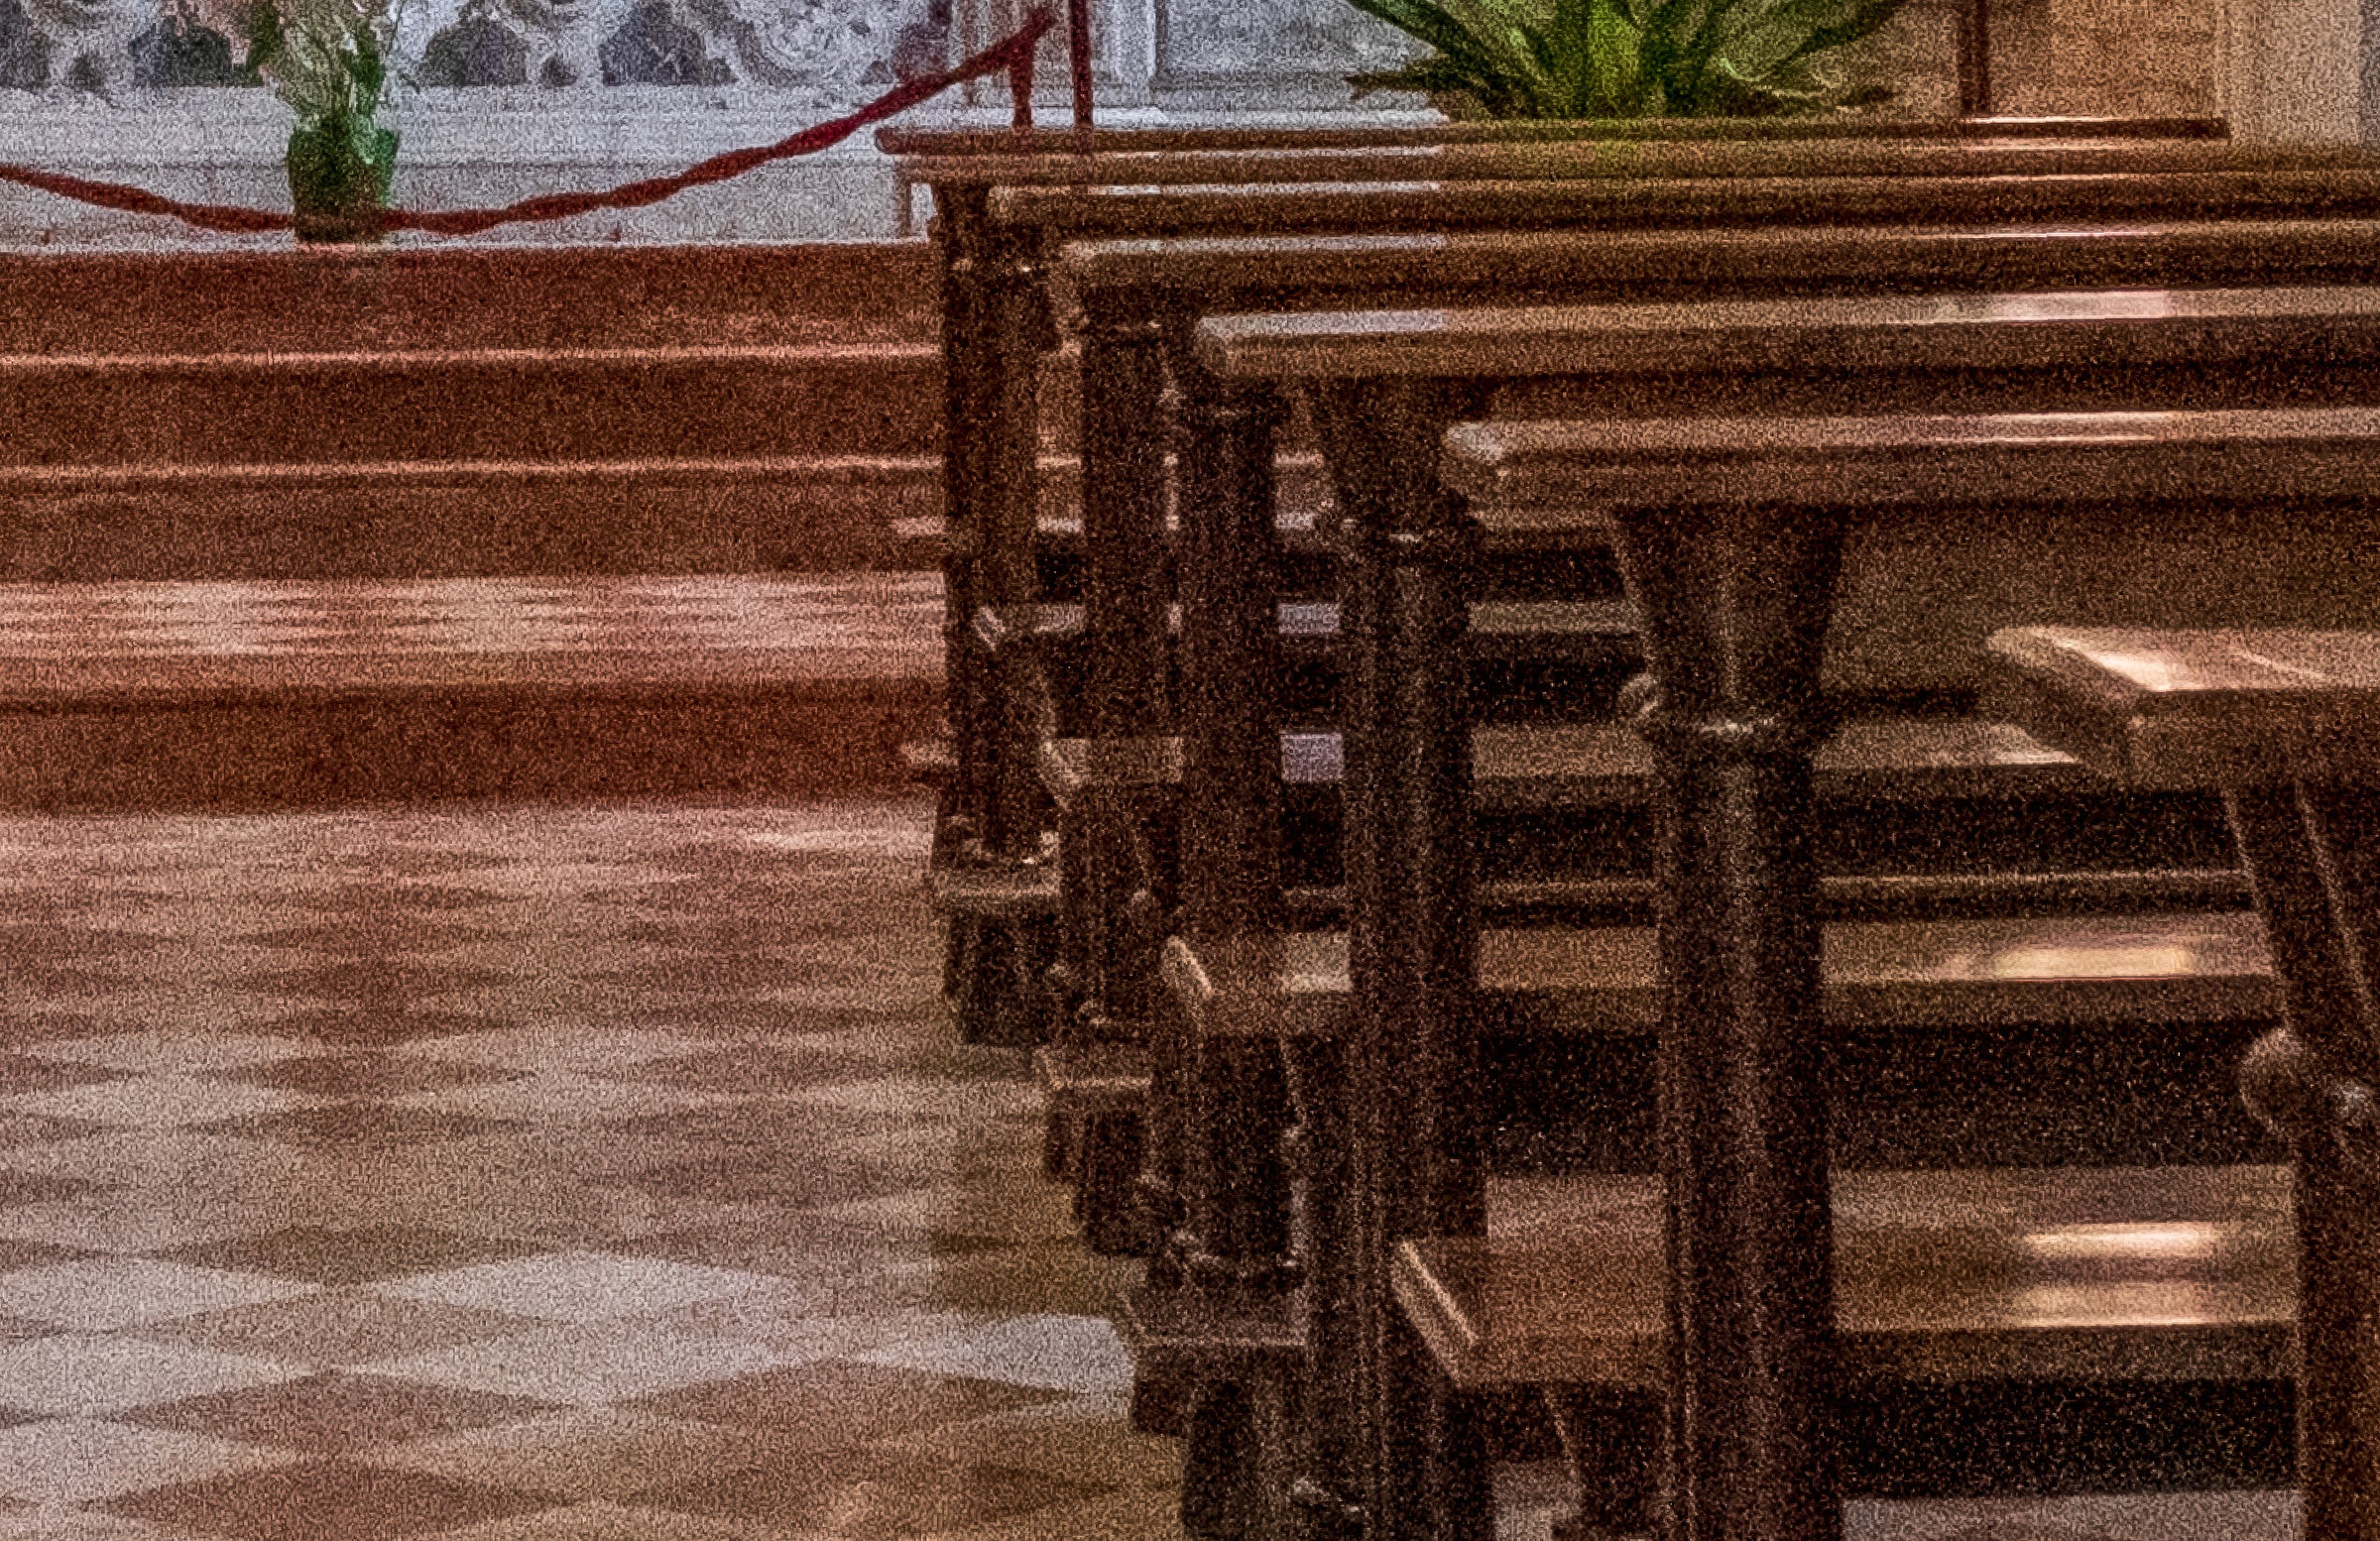
The following image was shot handheld at 1/60 shutter speed and ISO 6400. I’ve adjusted the exposure to brighten the scene, but that’s made the noise more apparent, particularly when I view the image at 200% scale. The noise is especially prominent in the dark areas.
Lightroom
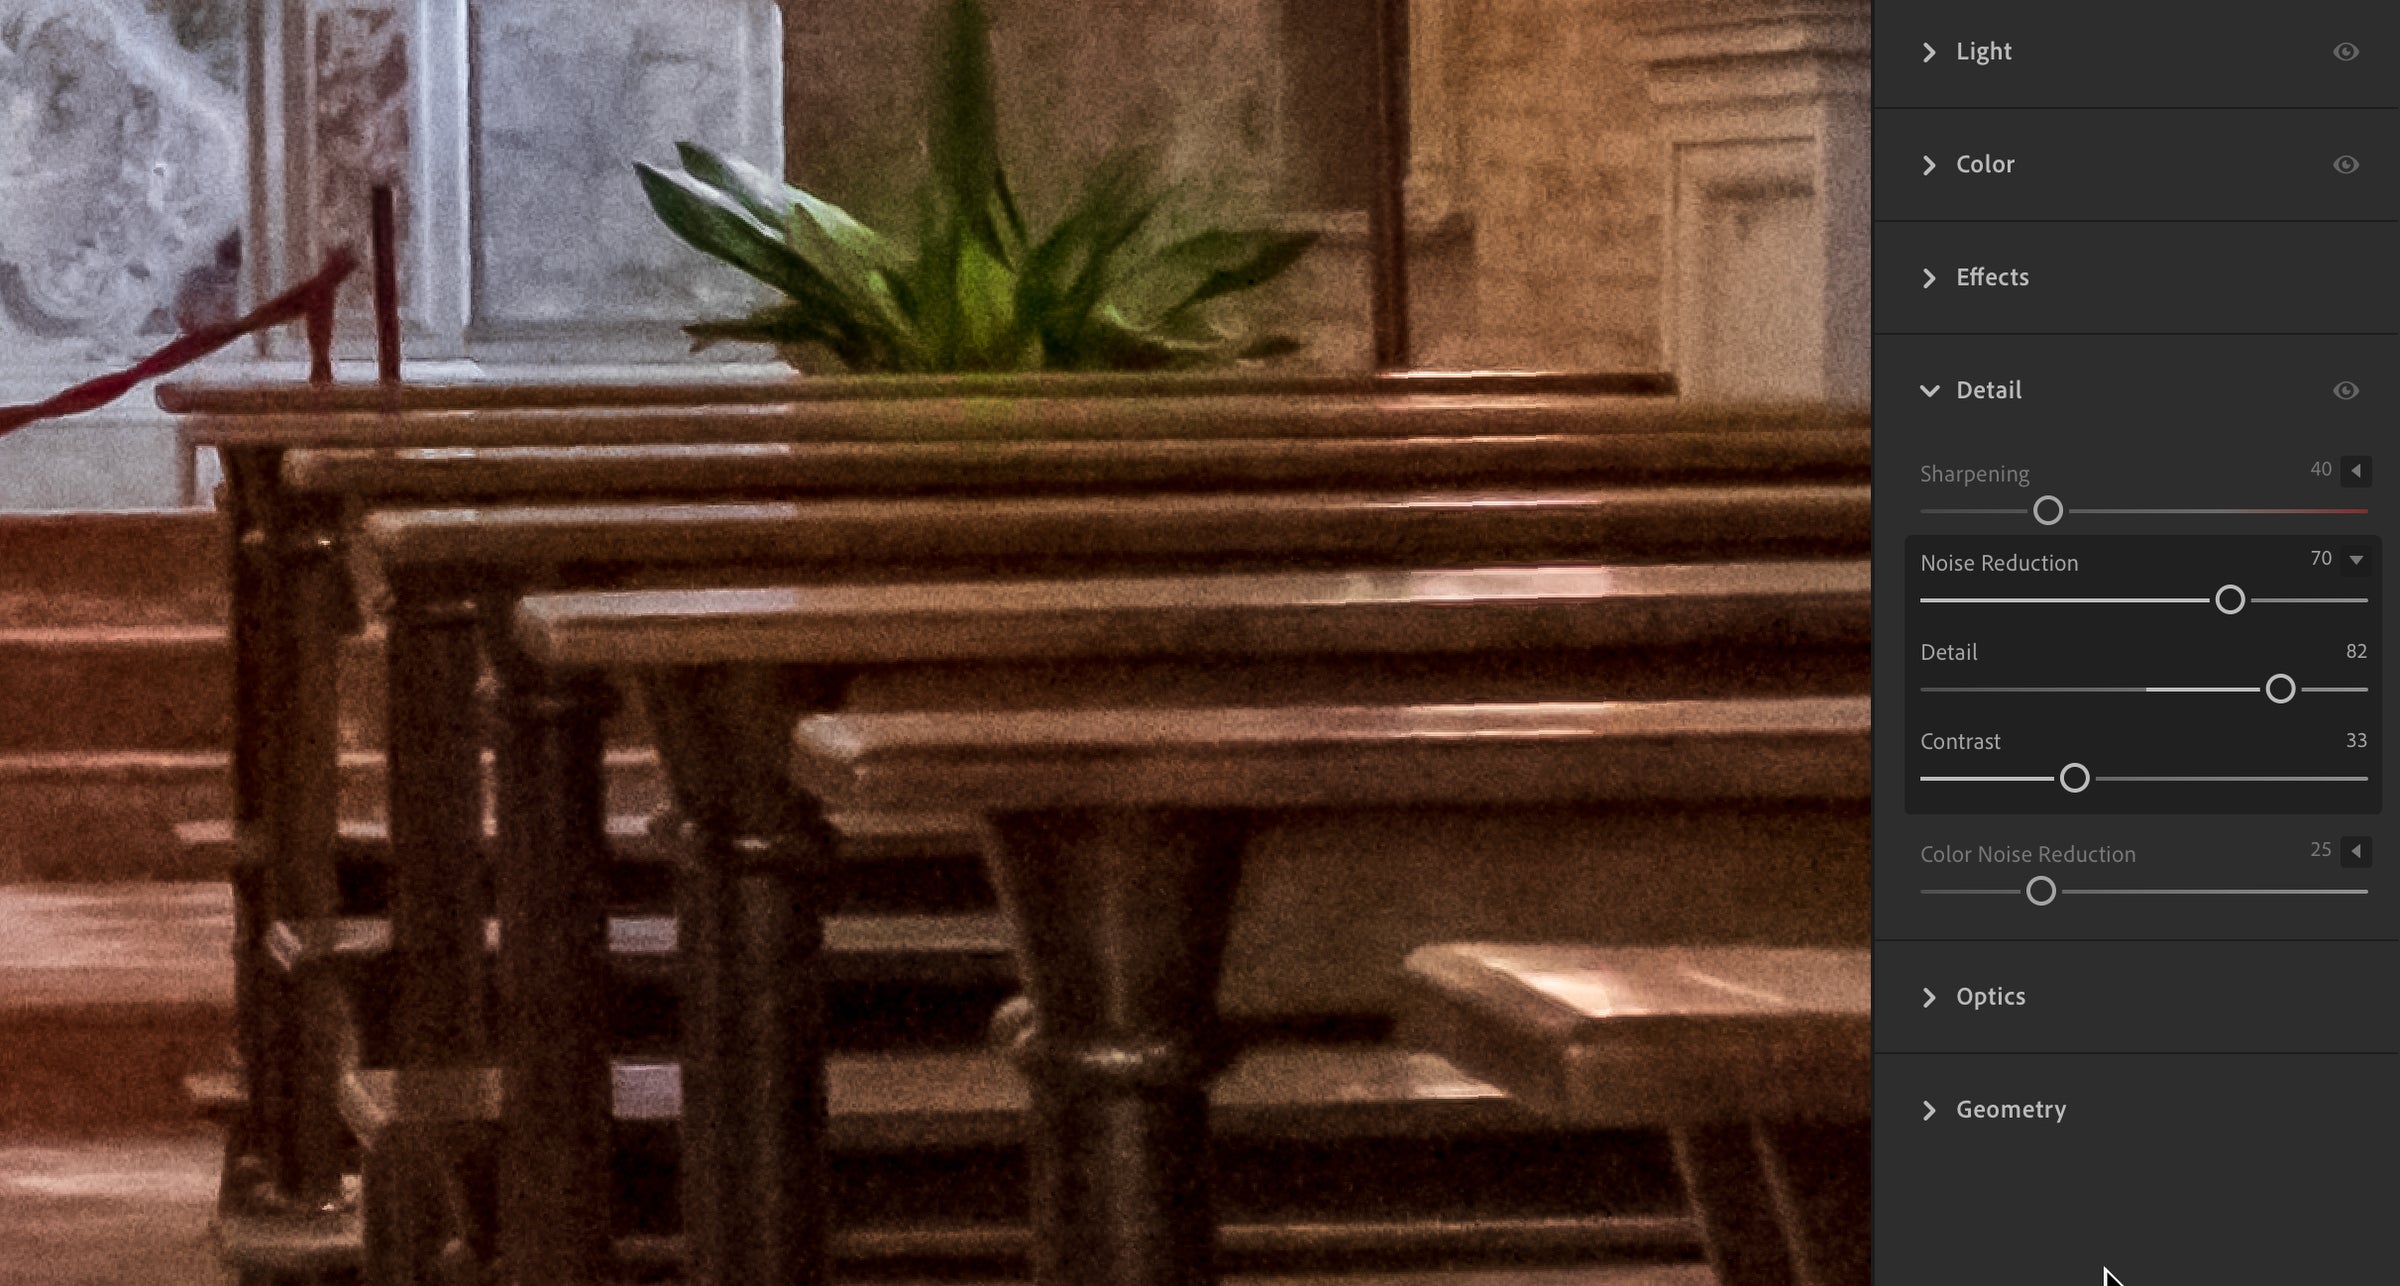
If I apply Lightroom’s Noise Reduction controls, I can remove the noise, but everything gets smudgy (see below).
ON1 NoNoise AI
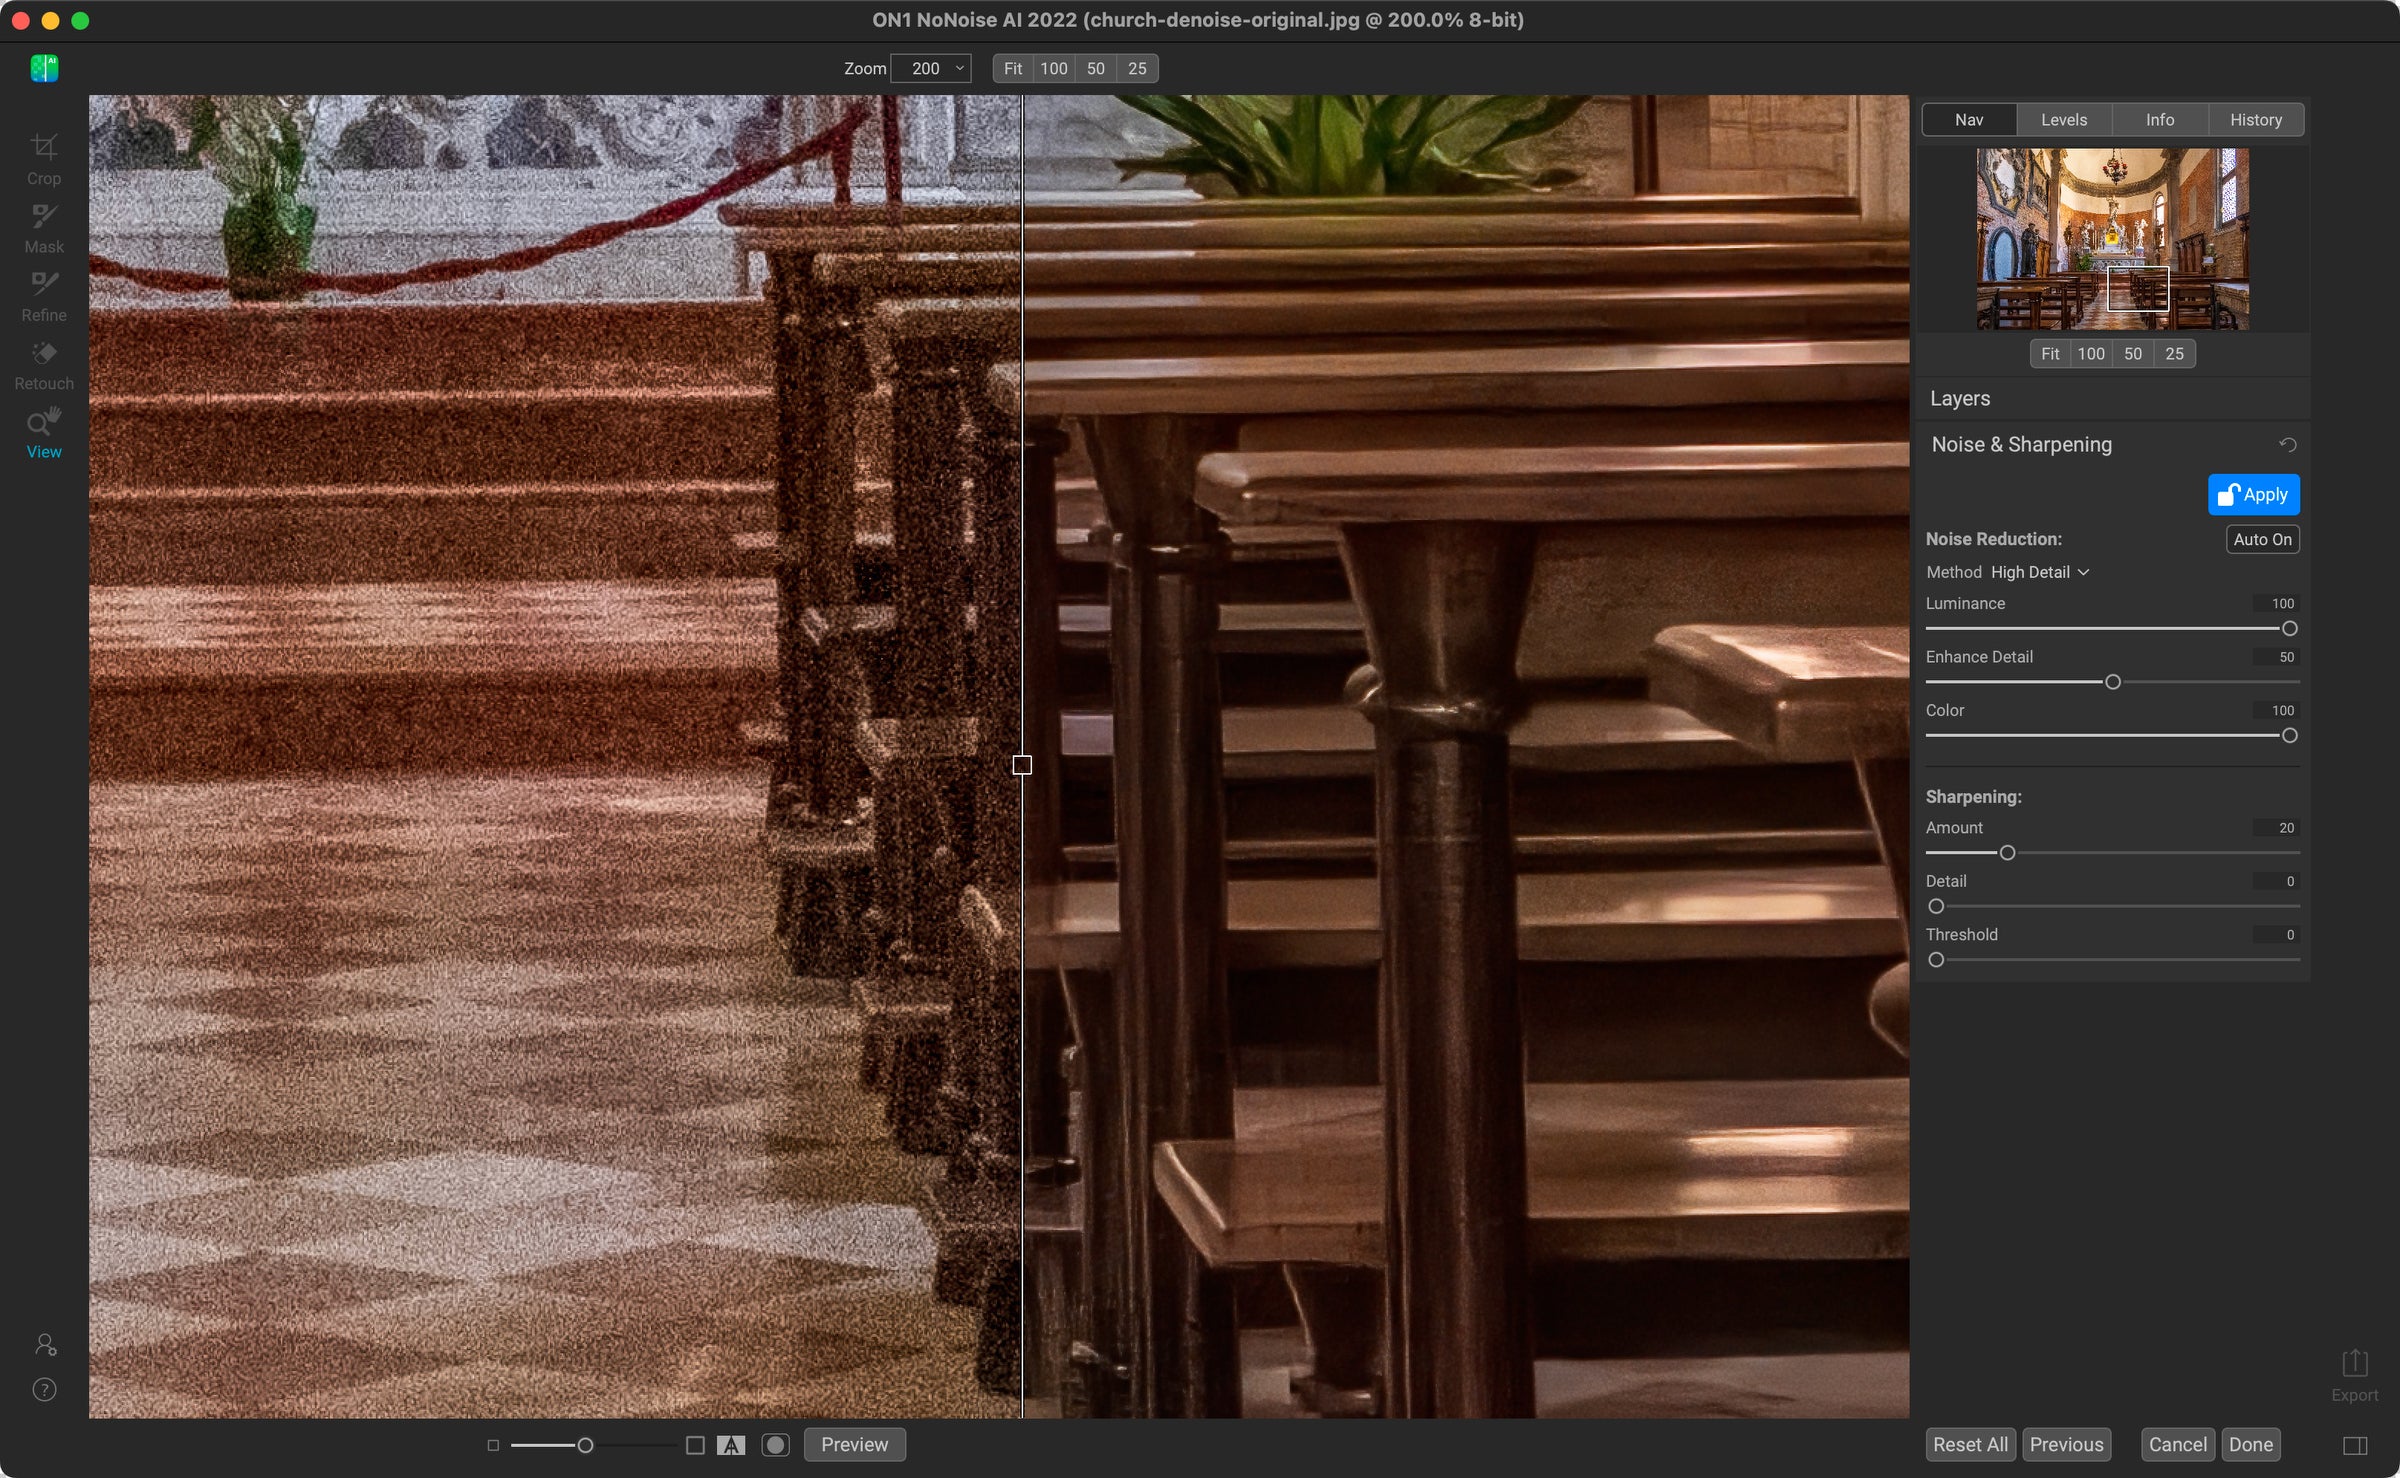
When I open the image in ON1 NoNoise AI, the results are striking. The noise is removed from the pews, yet they retain detail and contrast. There’s still a smoothness to them, but not in the same way Lightroom rendered them. This is also the default interpretation, so I could manipulate the Noise Reduction and Sharpening sliders to fine-tune the effect. Keep in mind, too, that we’re pixel-peeping at 200%; the full corrected image looks good.
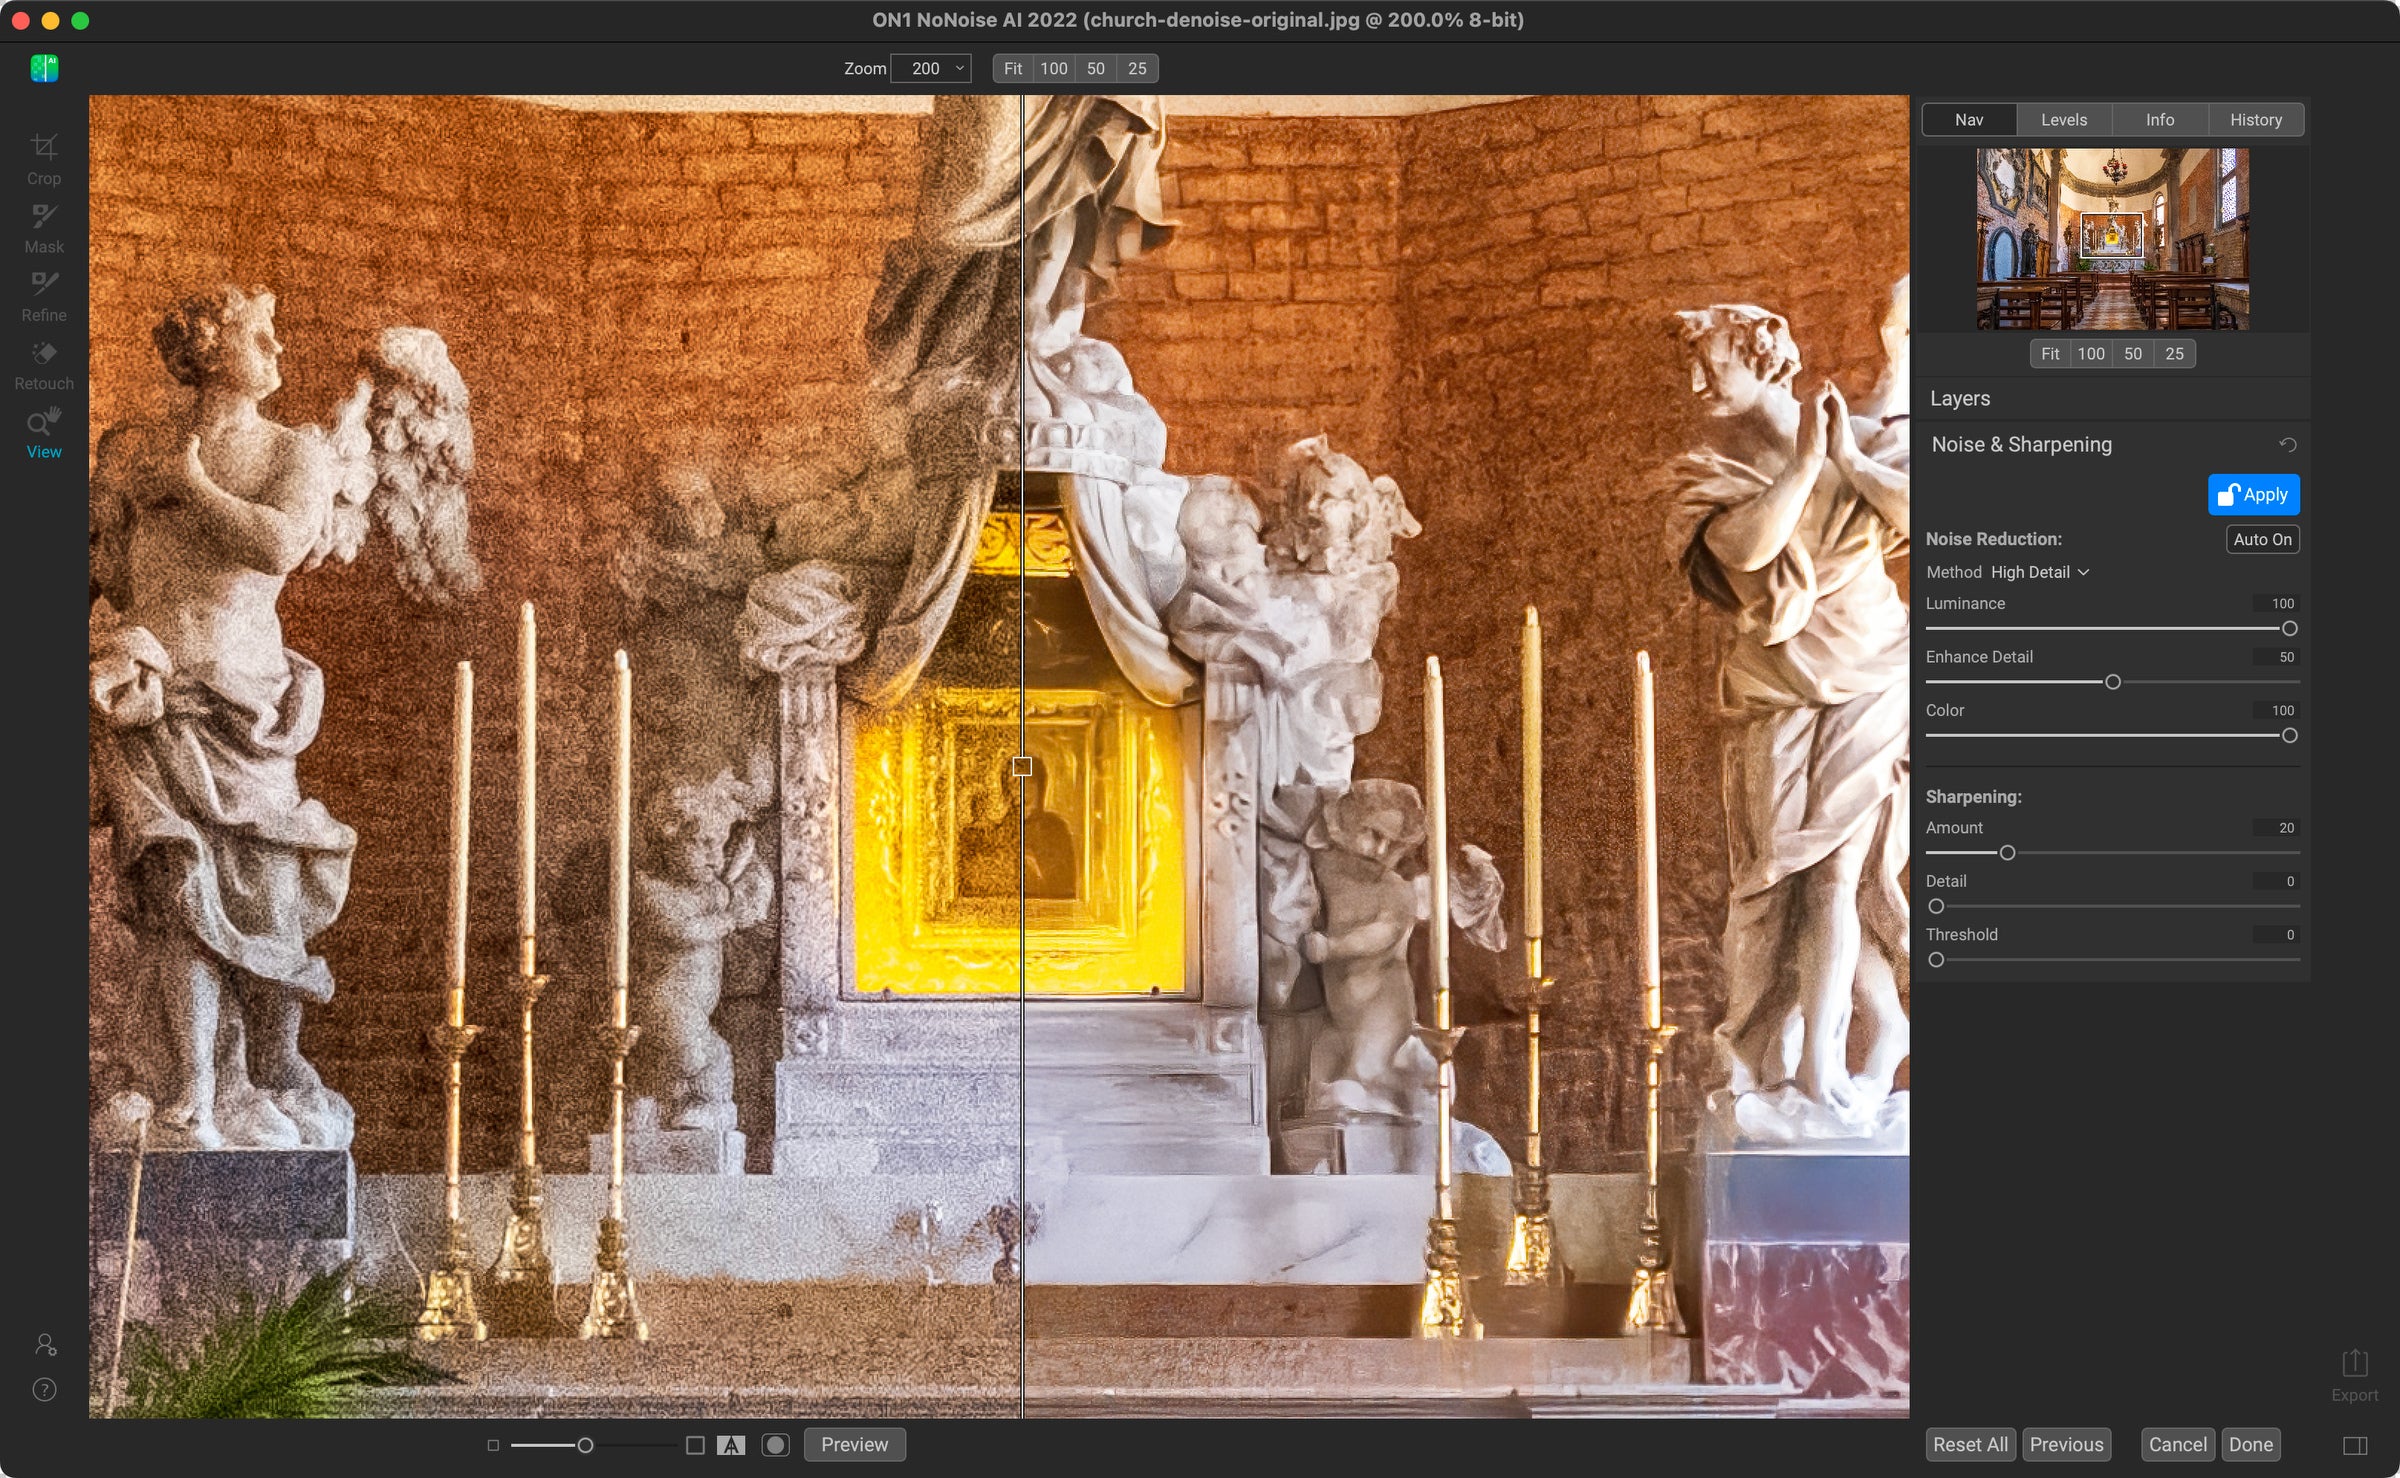
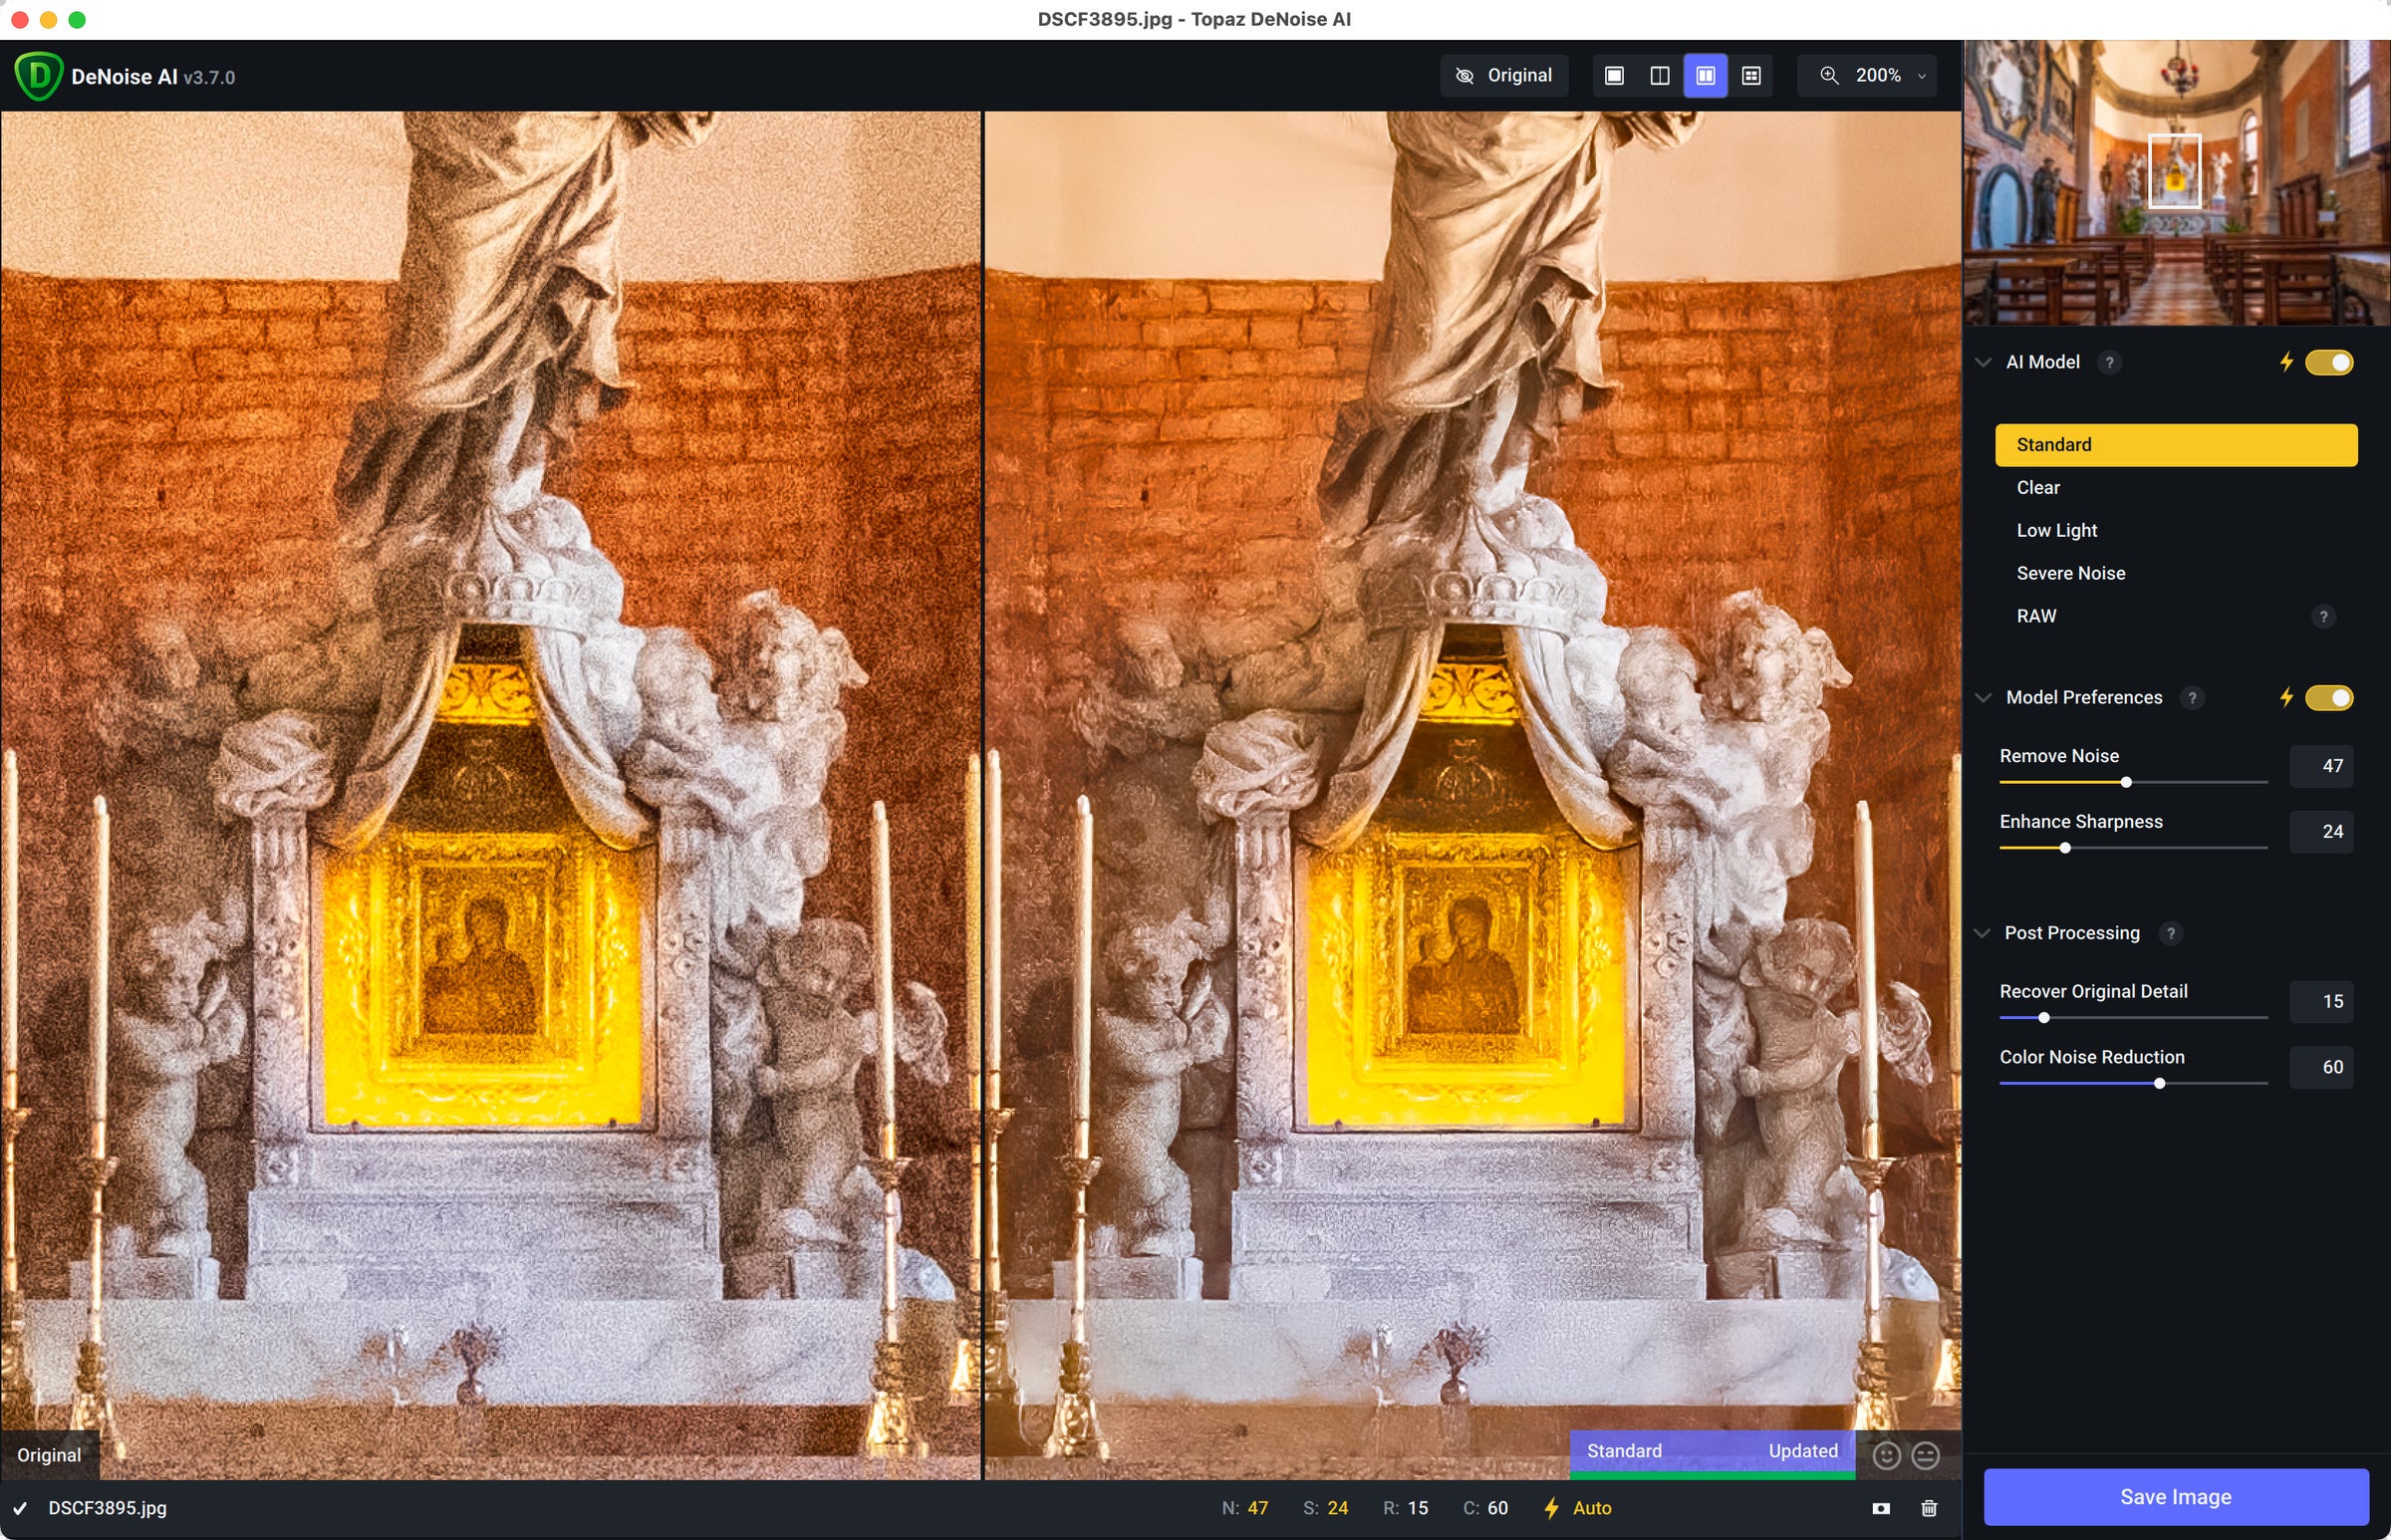
Looking at the detail in the center of the photo also reveals how much noise reduction is being applied. Again, this is at 200%, so in this view the statues seem almost plastic. At 100% you can see the noise reduction and the statues look better.
Topaz DeNoise AI
When I run the same photo through Topaz DeNoise AI, you can see that the software is using what appears to be object recognition to adjust the de-noise correction in separate areas—in this case not as successfully. The cream wall in the back becomes nice and smooth as if it was shot at a low ISO, but the marble at the front is still noisy.
Bring the noise
As always, your mileage will vary depending on the image, the amount of noise, and other factors. I’m not here to pit these two apps against each other (you can do that yourself—both offer free trial versions that you can test on your own images).
What I want to get across are two things. One, AI is making sizable improvements in how noise reduction is handled. And because AI models are always being fed new data, they tend to improve over time.
But more important is this: Dealing with image noise is no longer the hurdle it once was. A noisy image isn’t automatically headed for the trash bin. Knowing that you can overcome noise easily in software makes you rethink what’s possible when you’re behind the camera. So try capturing a dark scene at a very high ISO, where before you may have just put the camera away.
And don’t be like me and forget to reset the ISO after shooting at high values the night before. Even if the software can help you fix the noise.
The post Bring on the noise: How to save high ISO files deemed ‘too noisy’ appeared first on Popular Photography.