Learn to colour correct like a pro with our free course DaVinci Resolve Colour Grading for Beginners. You’ll learn how to use each important tool in Resolve, including how to set up your project using scene cut detection, how to get clean skin tones with noise reduction and how to create cinematic looks.
In this lesson I’ll show you how to add some finishing touches like film grain, in DaVinci Resolve.
How to Add Finishing Effects and Film Grain in Resolve
If you’ve followed along with our course so far you should be at the stage where you can add some finishing touches to your video.
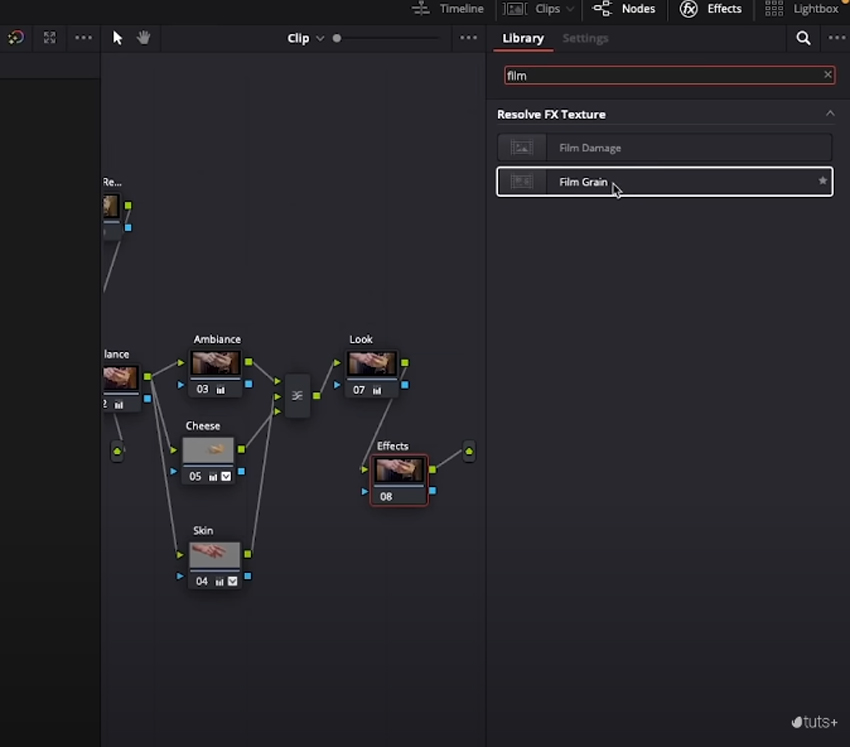
Library > Film Grain


In Effects you can search for Film Grain and then drag that across to your Effects node:


Choose a Grain


There are lots of different types of grain to choose from, and you might be thinking, well what’s the difference? A nice thing you can do if you wanted to, is to search for what one of your favourite films was shot on – let’s say it was Moonrise Kingdom. That was shot on Kodak Vision 3 200T.


Back in Resolve we can then change that to 35mm 200T so it matches. Then you can adjust it, change the size of the film grain, the strength of the effect, and so on.


You should zoom in so that you can see the effect well and make sure you’re not overdoing it. If you oversell the effect then people will just look at it and instantly know it’s fake.
That’s film grain, but there’s a bunch of other great effects that you can use depending on what you’ve got in your shot. If you’ve got lights, you can use light rays to add some volumetric lighting. Another effect I really like is Halation, and I’ll go through that with you in another lesson.
More DaVinci Resolve Templates and Tutorials
About the Authors
Tom Graham created the video course that includes this lesson. Tom is a multi-skilled content creator with a background in commercial filmmaking. Marie Gardiner wrote the text version of this lesson.


