Learn to colour correct like a pro with our free course DaVinci Resolve Colour Grading for Beginners. You’ll learn how to use each important tool in Resolve, including how to set up your project using scene cut detection, how to get clean skin tones with noise reduction and how to create cinematic looks.
This lesson is a quick look at how to isolate your skin tones in Resolve, ready for colour correction.
How to Isolate Skin Tones for Colour Correction in Resolve
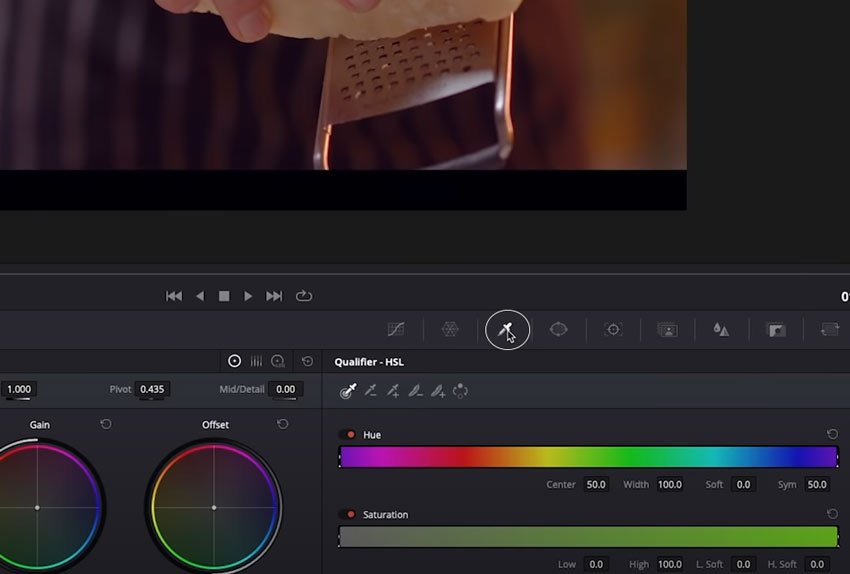
Find the little eyedropper on your toolbars.


With your skin tone node highlighted, the first thing to do is to go to the qualifier tool circled above, and then grab your skin tone with the colour dropper.


It might look like nothing’s happened but if you click the magic wand tool in the top left corner (circled above) then you can see what you’ve actually grabbed, and that should be most of the skin.
Above you can see some wall and cheese as well because they’re similar tones. You can then use the dropper on different parts of the skin if you want to get a cleaner selection.


For the footage above, it’s important to grab the knuckles because they’re one of the main focuses of the image.
That’s your skin tones isolated in your Skin node, ready for further correction, which we’ll look at in an upcoming tutorial.
More Resolve Colour Grading Tutorials


How to Use Node-based Colour Grading in DaVinci Resolve


How to Use the Primaries Color Wheels in DaVinci Resolve


In-depth Overview: Learn the Colour Tab in DaVinci Resolve


A Quick Guide to the Layout in DaVinci Resolve 18, for Beginners
About the Authors
Tom Graham created the video course that includes this lesson. Tom is a multi-skilled content creator with a background in commercial filmmaking.
Marie Gardiner wrote the text version of this lesson and it was edited and published by Jackson Couse.


