Machine learning technology is used in many aspects of modern photography, from shooting images that would otherwise be difficult to capture to speeding up sorting and editing. This week I want to focus on a targeted implementation that ripples through the entire image edit process: translating and processing the data in Raw files. Specifically, I’m looking at DxO PureRAW 2, which uses a technology called DeepPRIME to demosaic and denoise the unedited data in Raw files to create better editable versions. The technology is also available in DxO PhotoLab 5, the company’s photo editing app.
The process of Raw processing
First, let’s get on the same page about Raw processing.
If your camera is set to shoot in JPEG or HEIC formats, the camera’s processor does a lot of work to take the light information captured by the sensor, interpret it as luminance and color values, and create an image made up of colored pixels. The photo is also compressed to save storage, so a significant amount of image data is thrown away.
When you shoot in the camera’s Raw format, the file it saves is made up entirely of the data captured by the image sensor. It includes not just the values from each pixel, but information about how the sensor deals with digital noise, characteristics of the lens being used, and more. You also end up with larger image files because none of the data is purged in a processing step.
At this point, that file isn’t really a “photo” at all. The data has to be decoded before it can be viewed as an image. (When you see the shot on the camera’s screen, you’re actually looking at a JPEG preview.)
The first step is demosaicing, which interprets the color values produced by patterned filters on the camera’s image sensor. Most cameras use sensors with Bayer filters, while Fujifilm cameras use sensors with X-Trans filters.
The photo software’s algorithms translate that data to pixels and then apply some other processing adjustments such as denoising based on the information in the Raw file to minimize digital noise such as that caused by shooting at high ISO values. At that point, the Raw file is ready for your edits to tone, color, and so on.
Software such as Adobe Lightroom or Capture One automatically handles this process, making it appear that the Raw file has been opened just as if you’d opened a JPEG file. Some apps use an intermediary step, such as when Adobe Photoshop opens Raw images first in the Adobe Camera Raw interface.
Into the DeepPRIME
Related: The best photo editor for every photographer
That window between Raw data and editable file is where DxO PureRAW 2 comes in. Its DeepPRIME technology uses machine learning to demosaic and denoise the data and create a better image to work with. It then pulls from DxO’s extensive library of camera and lens profiles to apply optical corrections. (And honestly, DeepPRIME is just an awesomely cool name.)
In my testing, I’m seeing results in two specific areas: processing noisy high-ISO images and working with the Raw files from my Fujifilm X-T3, which are sometimes underserved by Lightroom’s conversion.
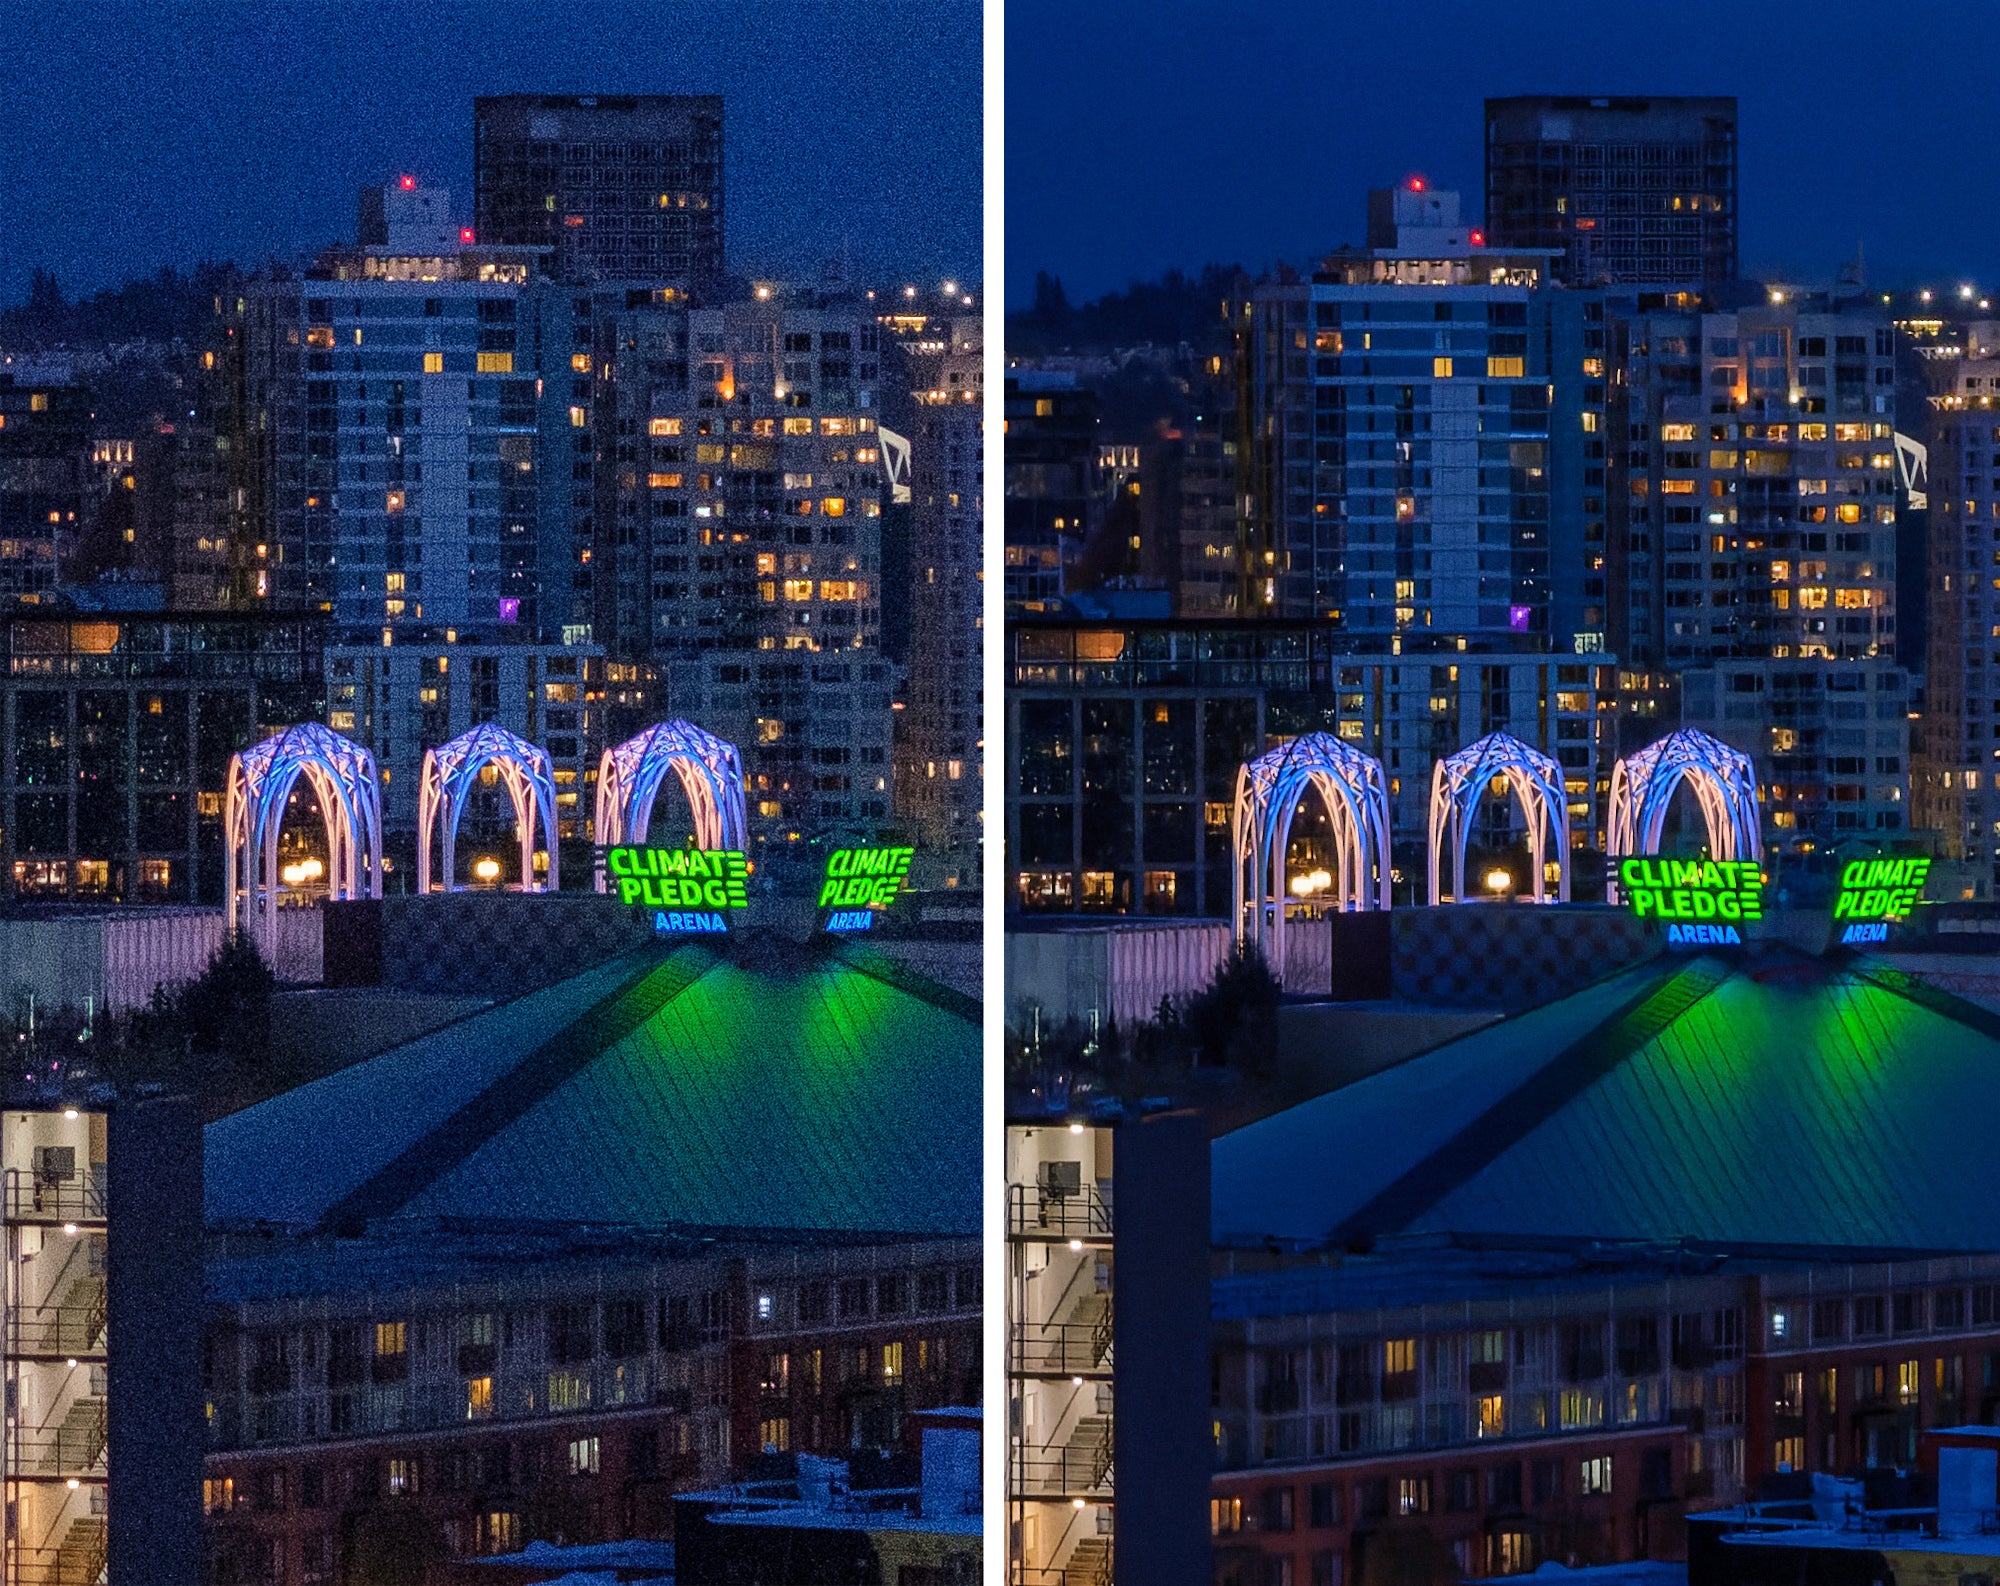
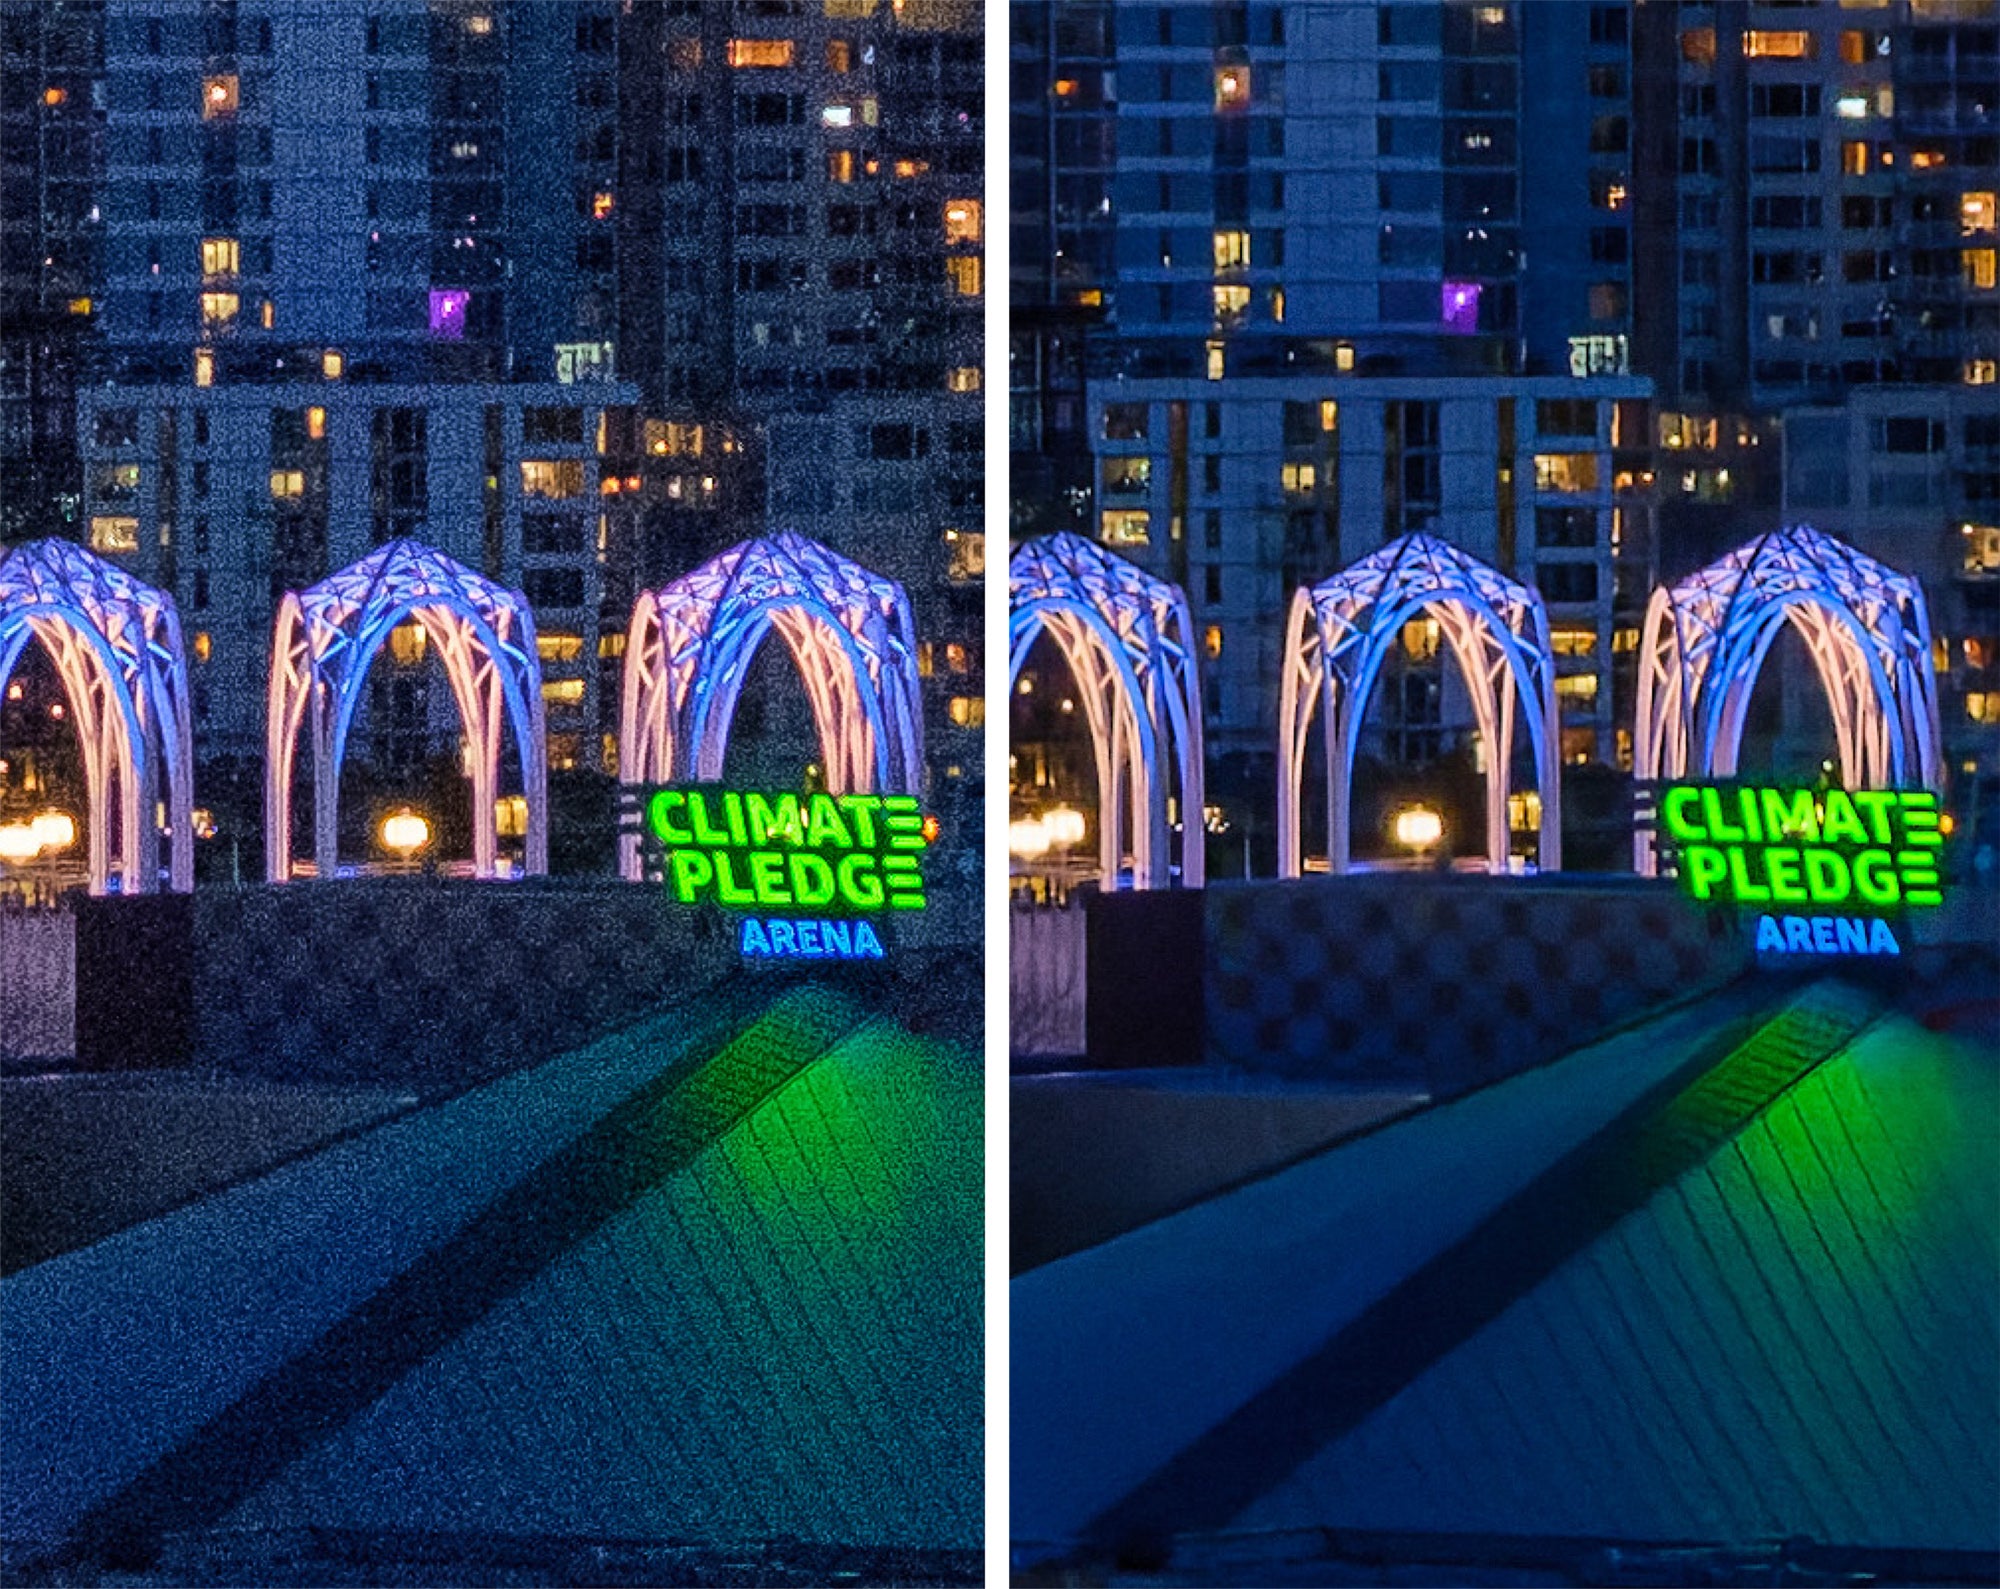
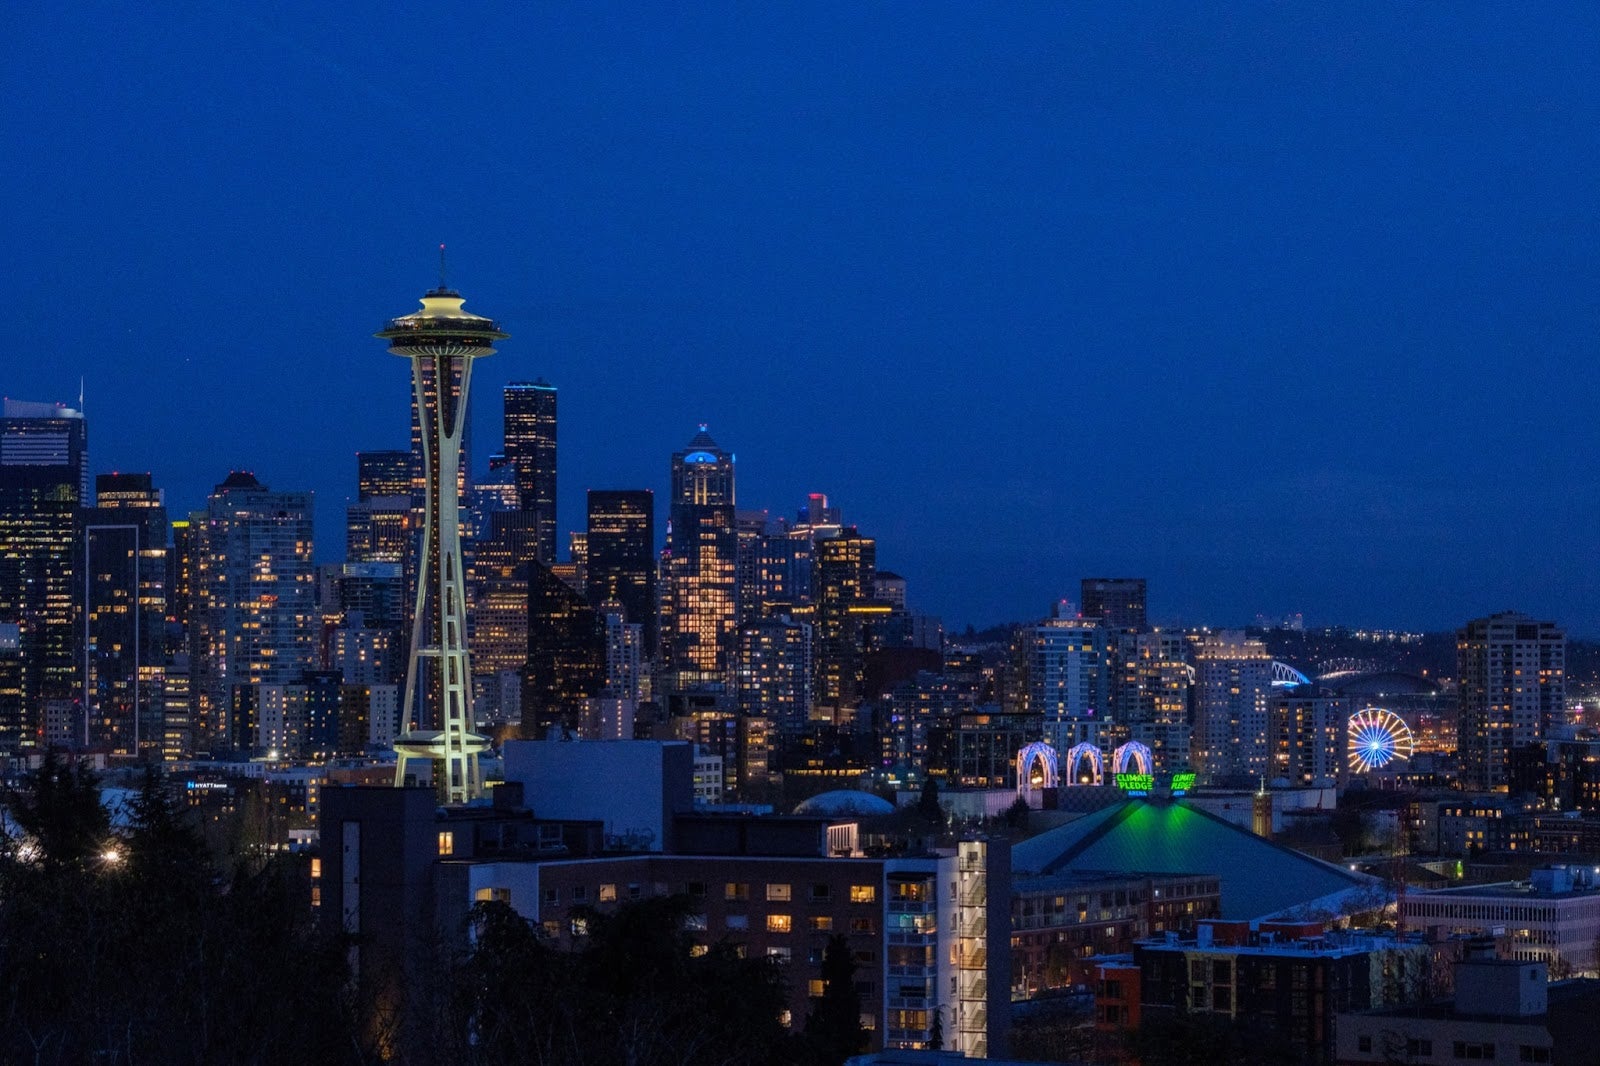
In this example of the Seattle skyline, shot handheld at ISO 3200, the Raw file processed by Lightroom Classic reveals noticeable noise. I’ve made only exposure changes since the original was still pretty underexposed. The PureRAW-processed image is much cleaner and only reveals some denoising softening when viewed at 200% magnification.
Another noisy example
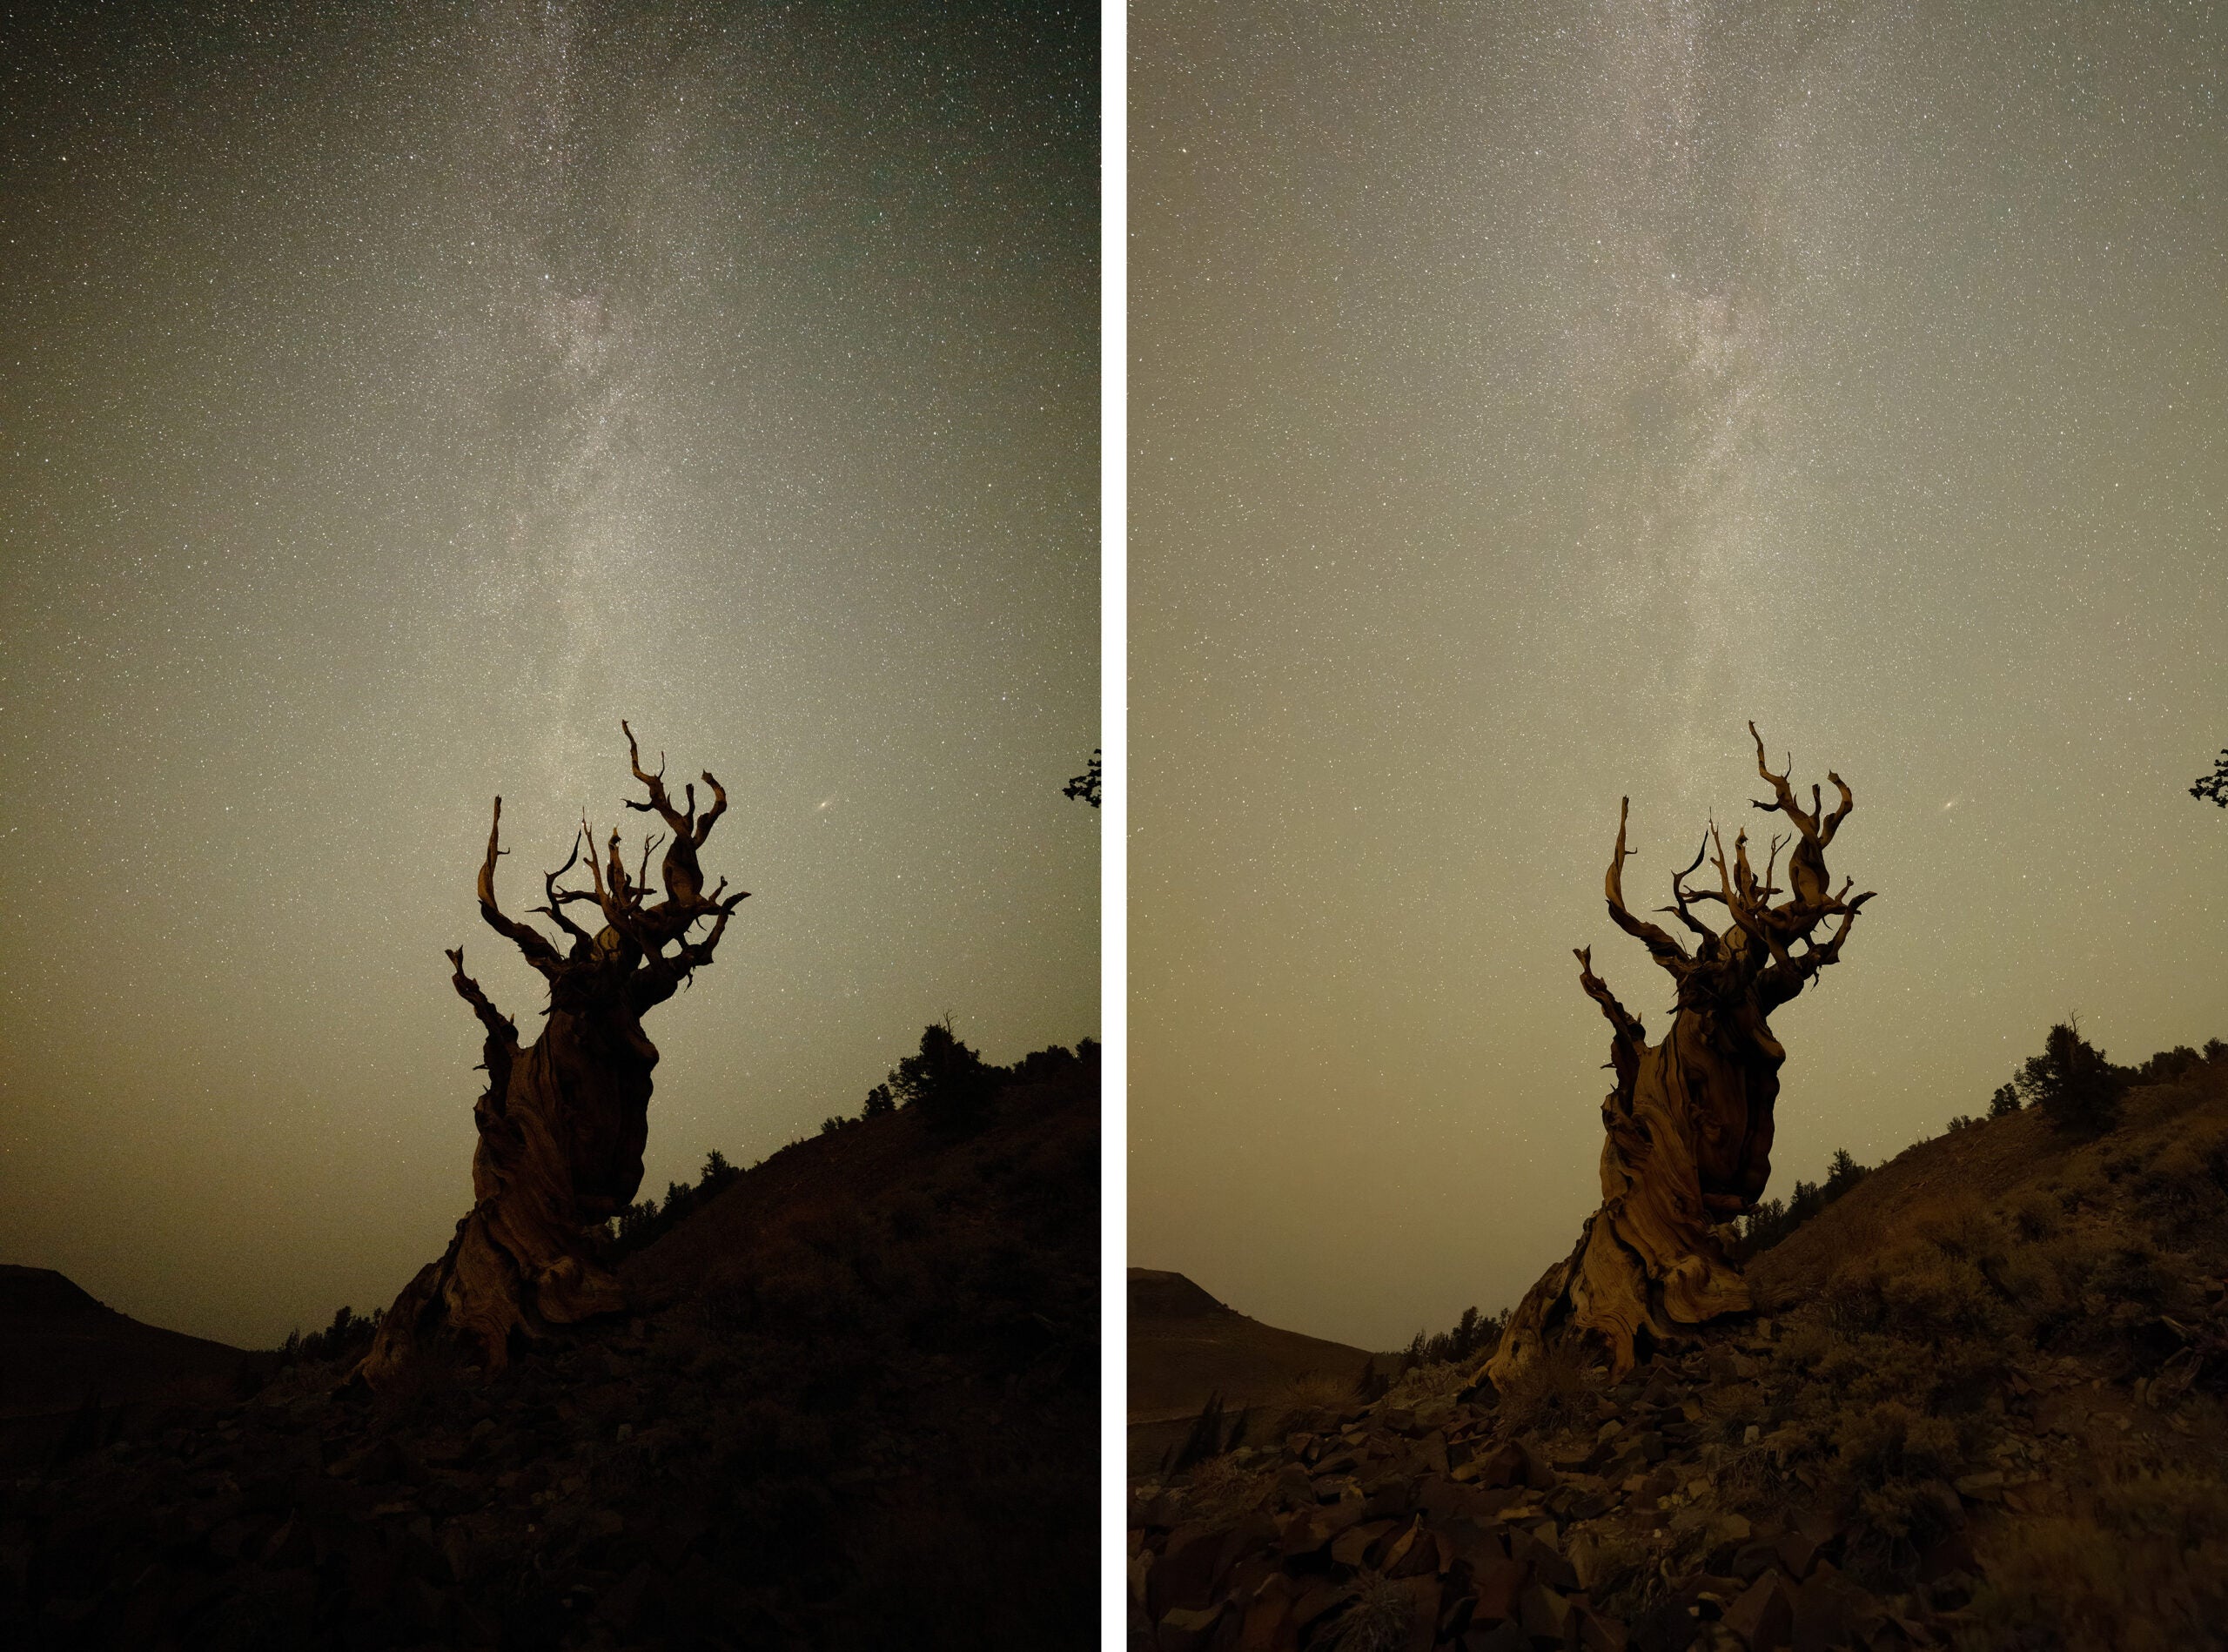
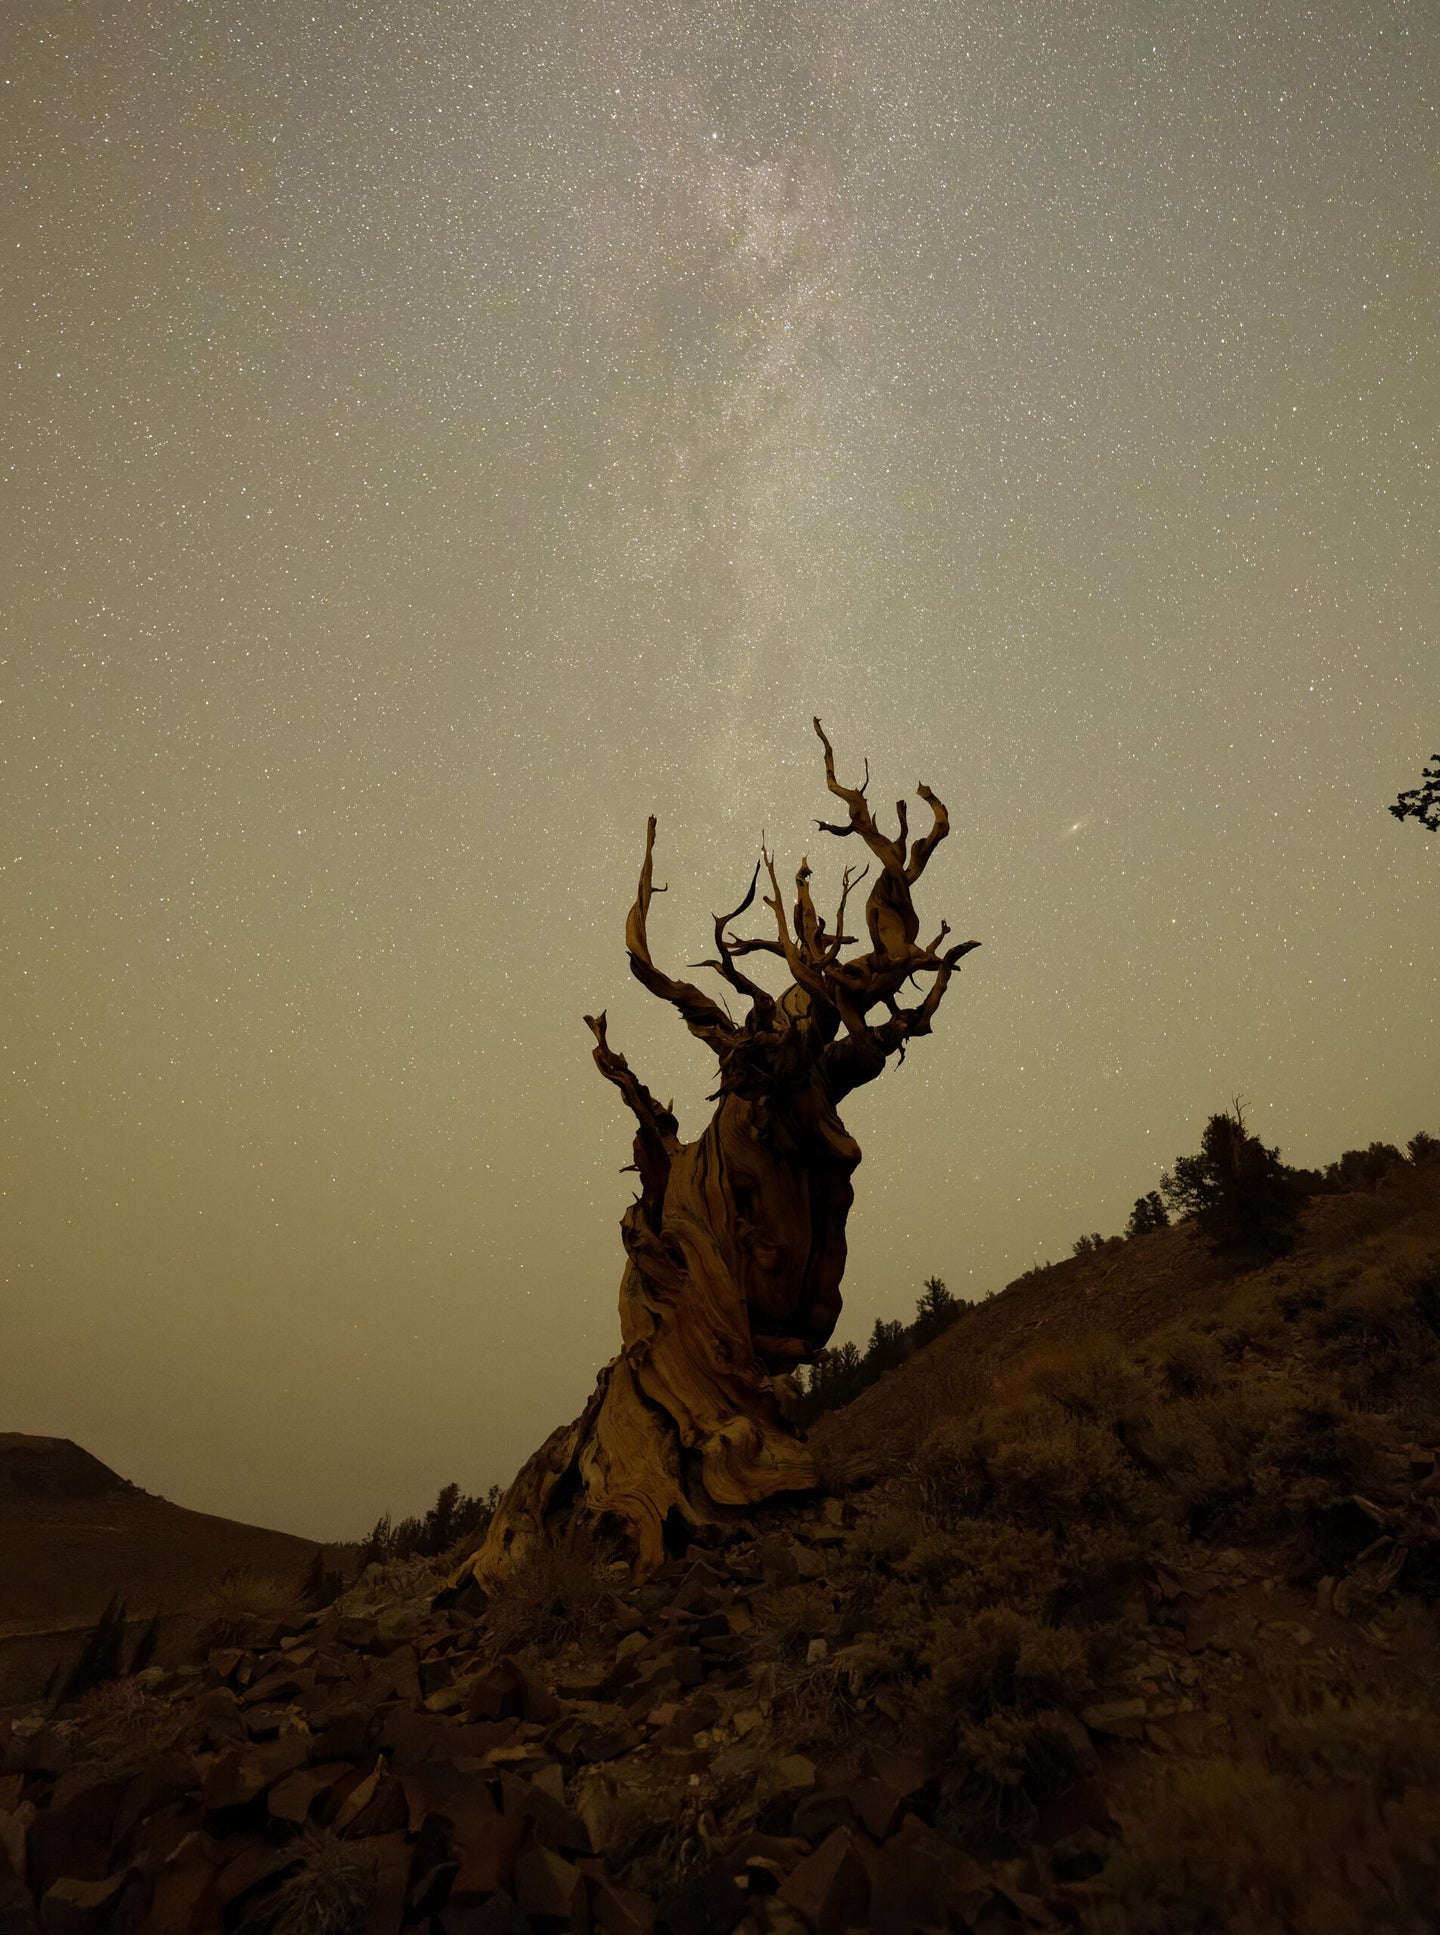
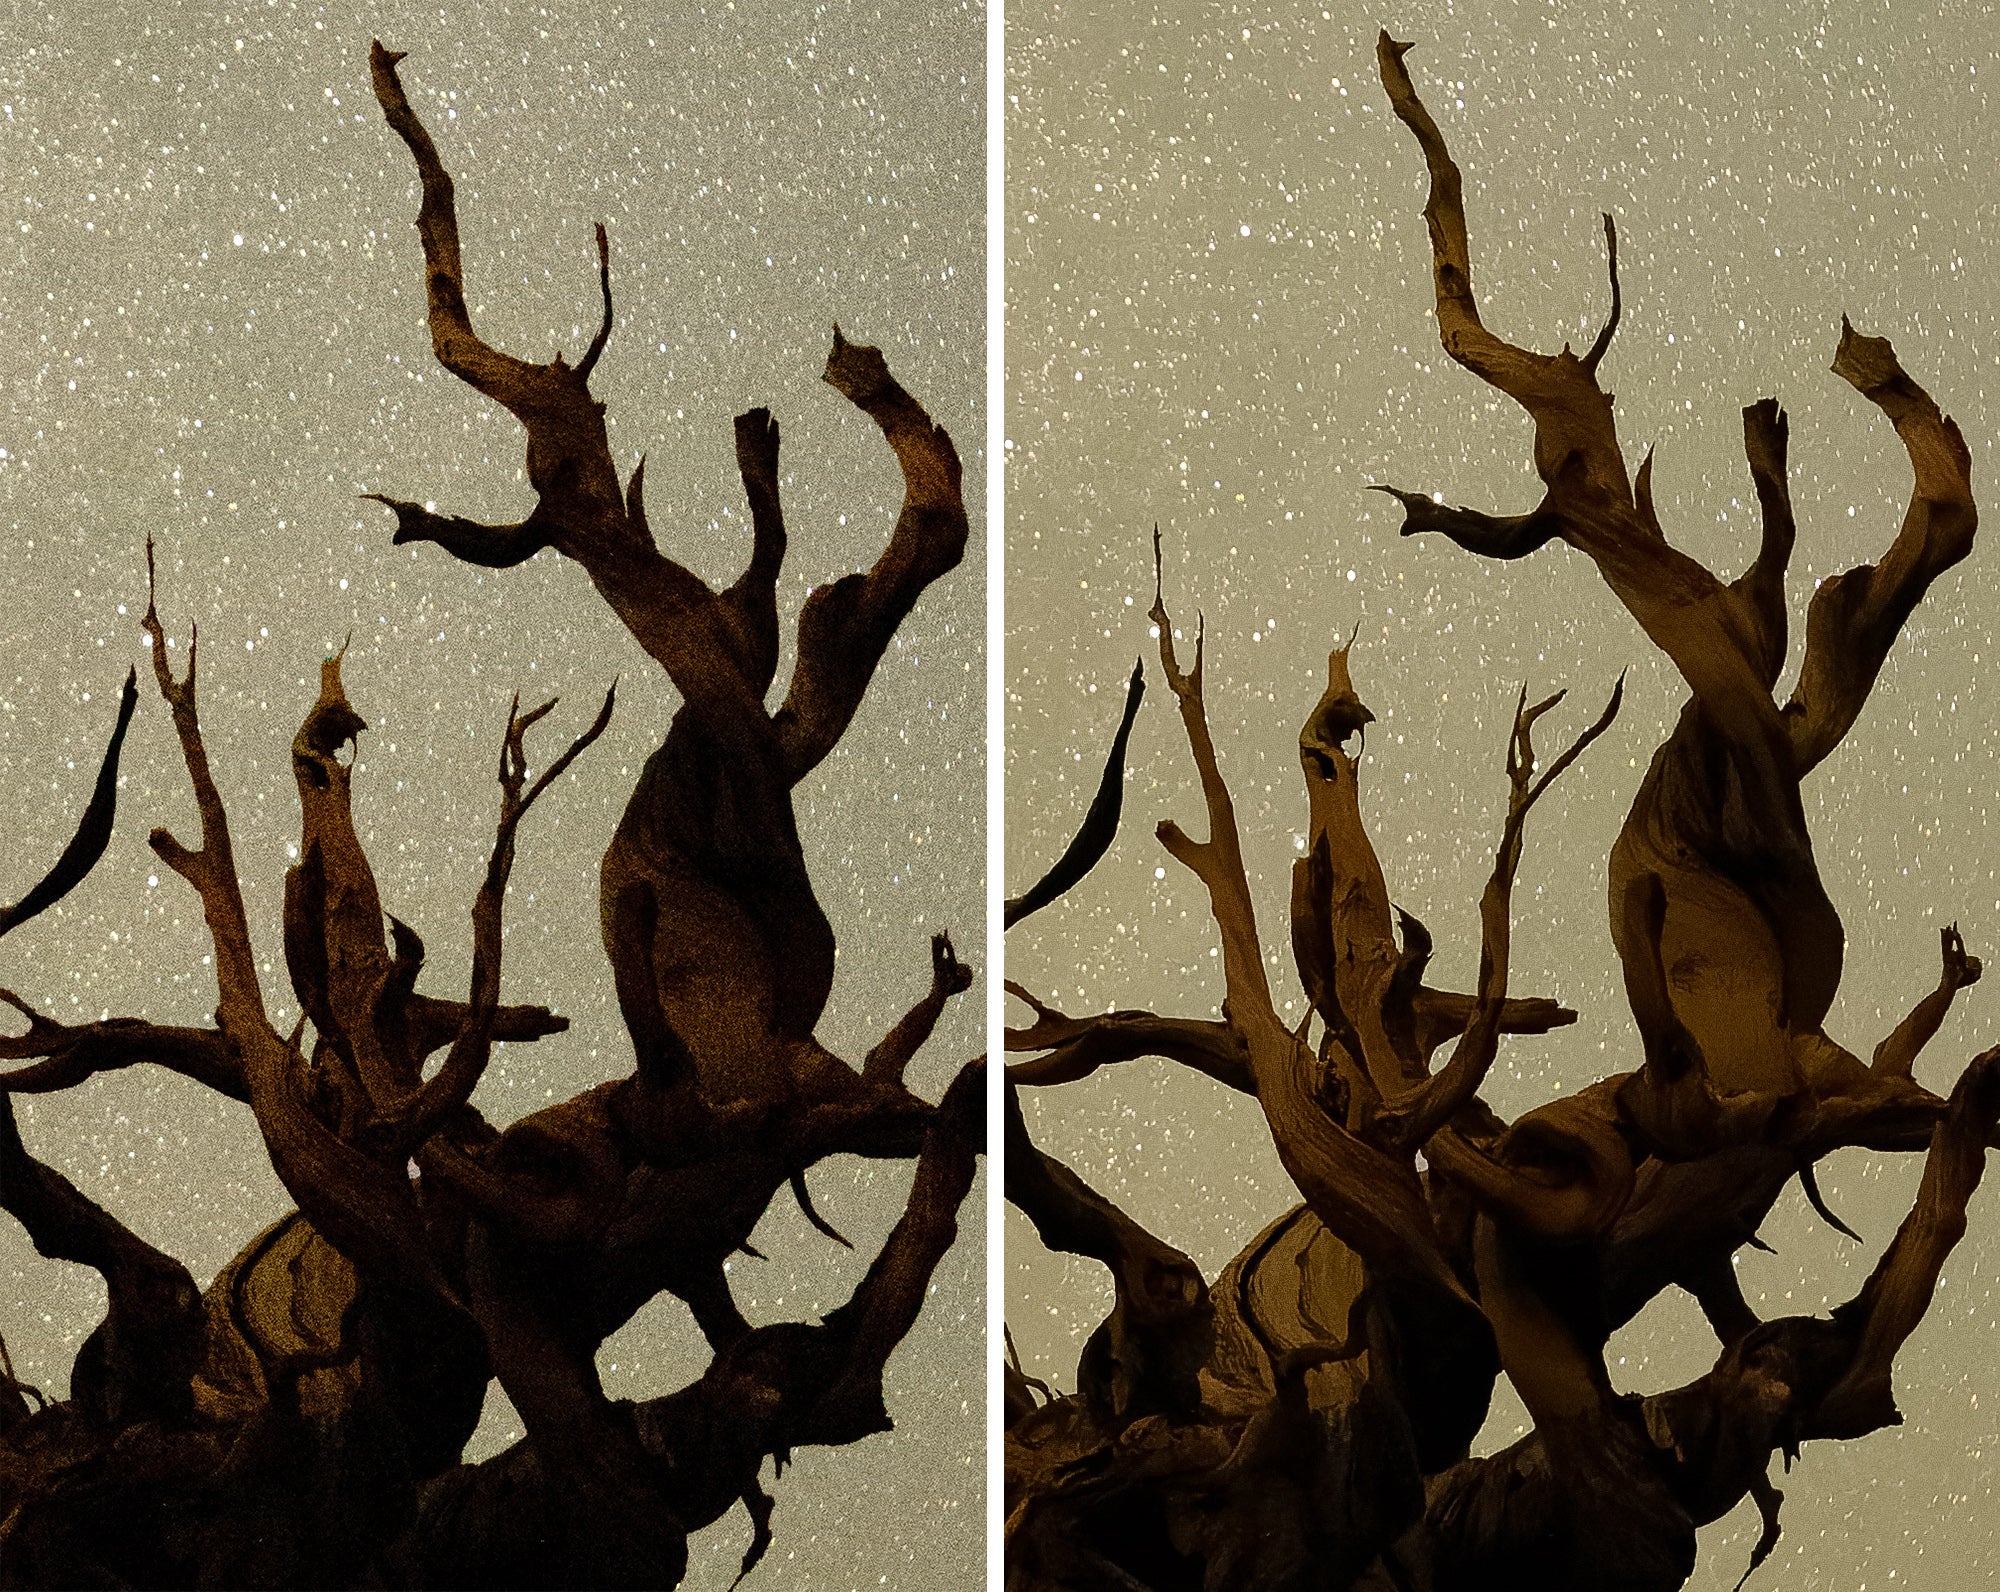
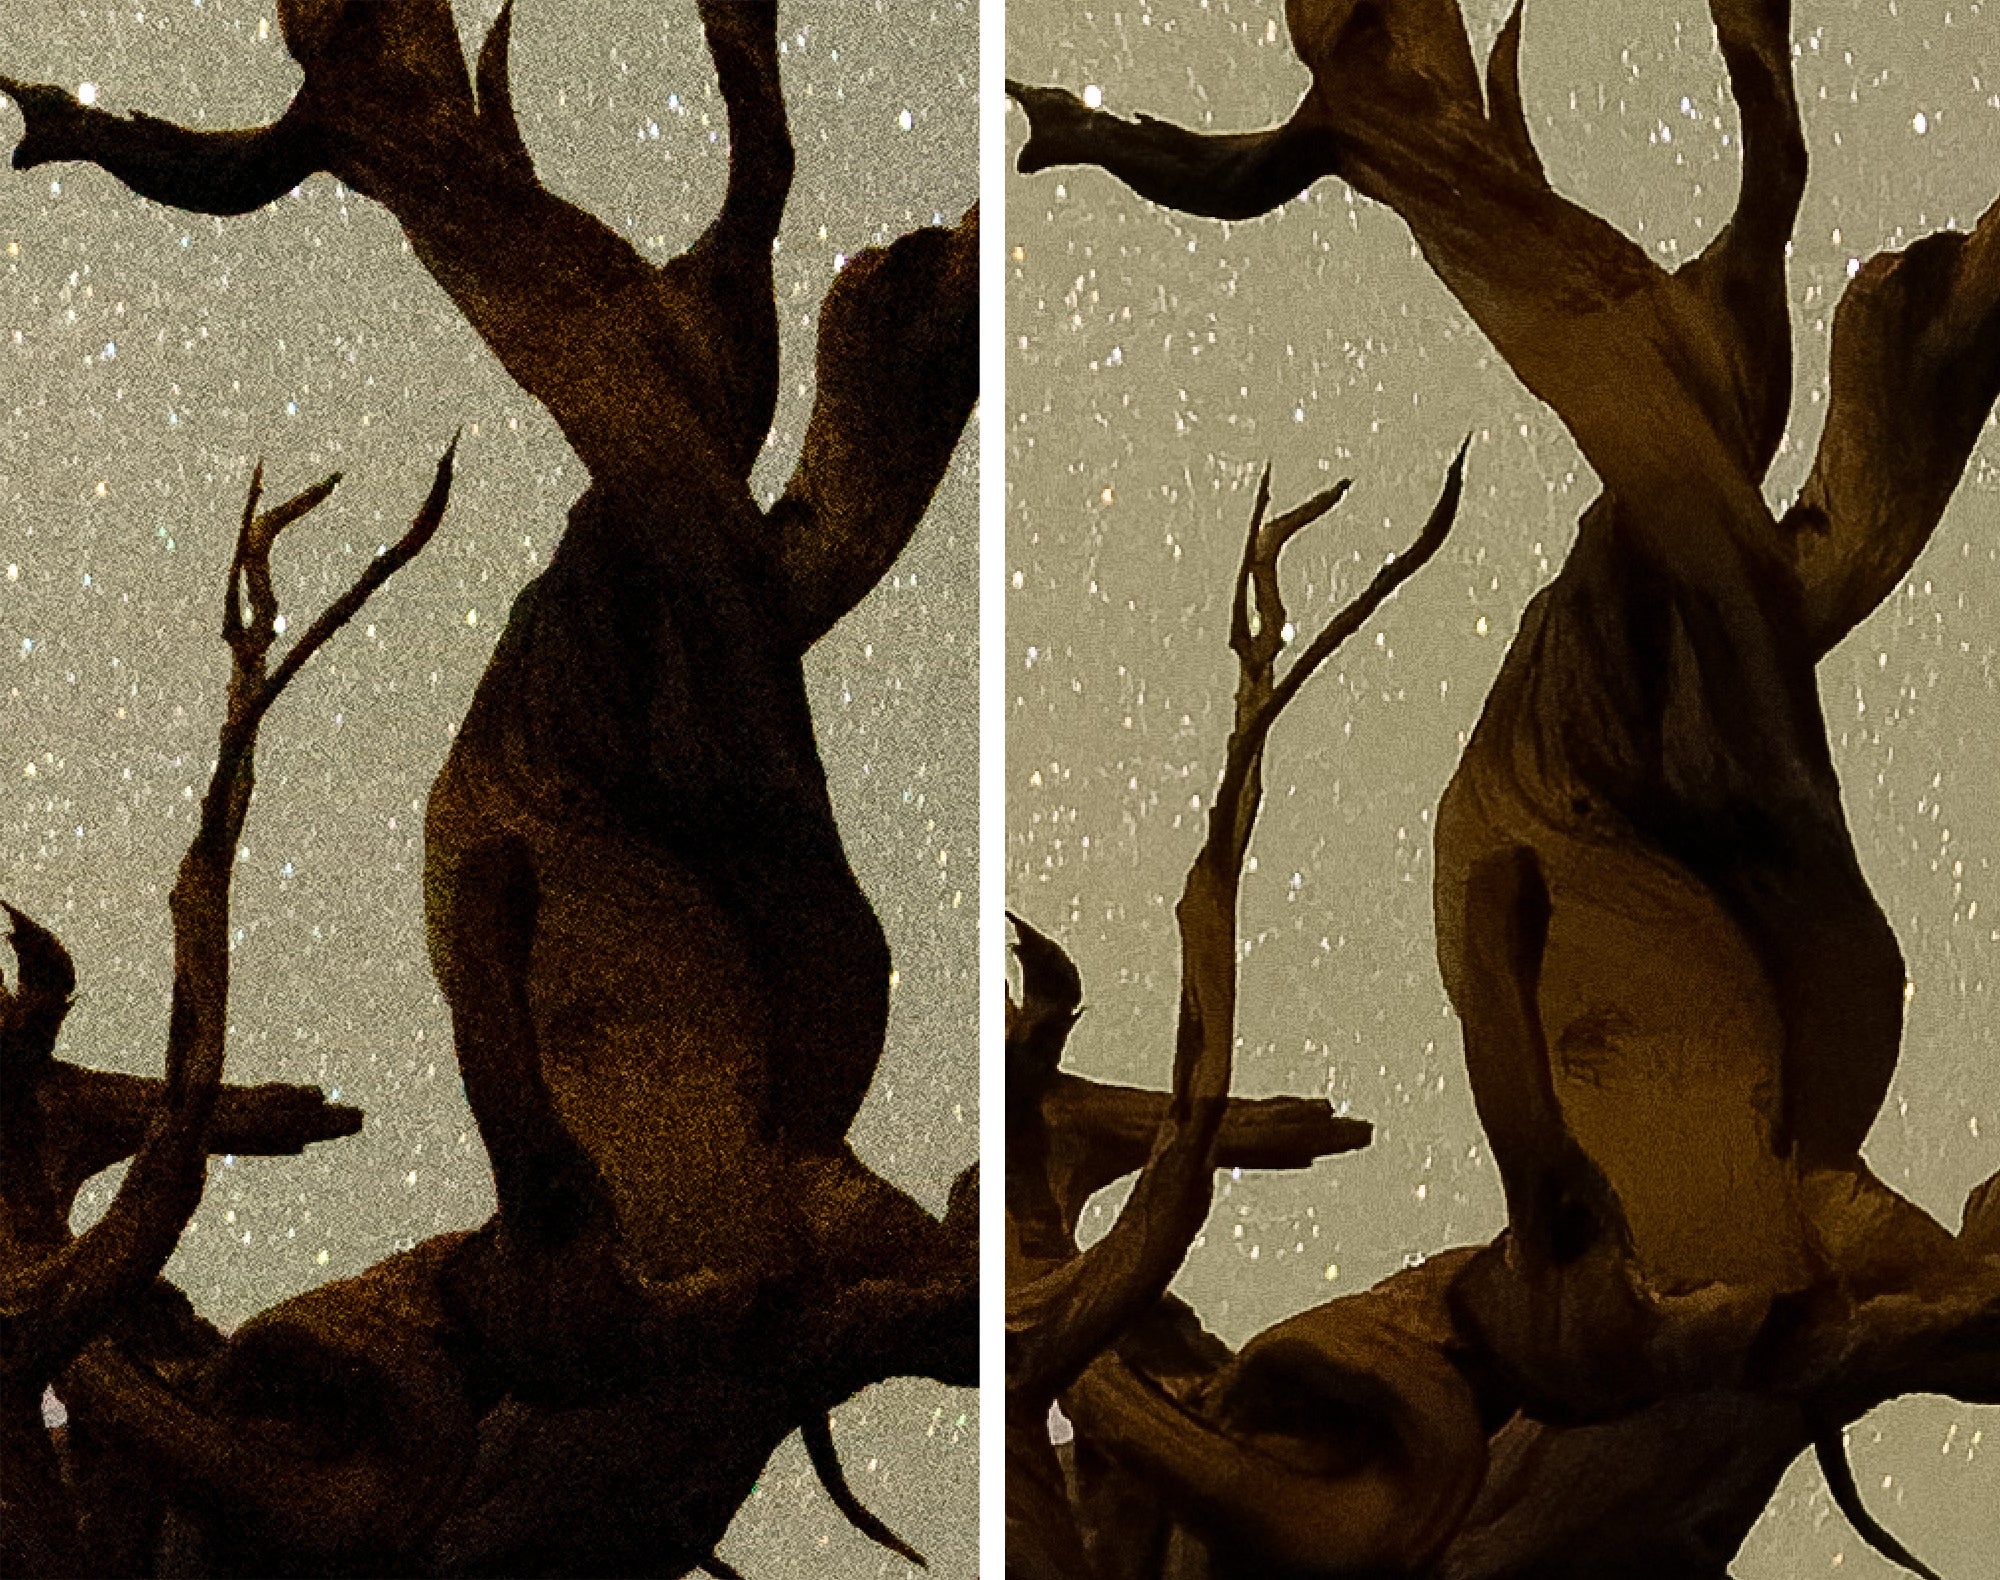
For another example, this image of a Bristlecone Pine was shot on a Sony A7R IV at ISO 12800 and processed in Lightroom and using PureRAW 2 without any other adjustments applied.
Processing Fujifilm Raw files with PureRAW 2
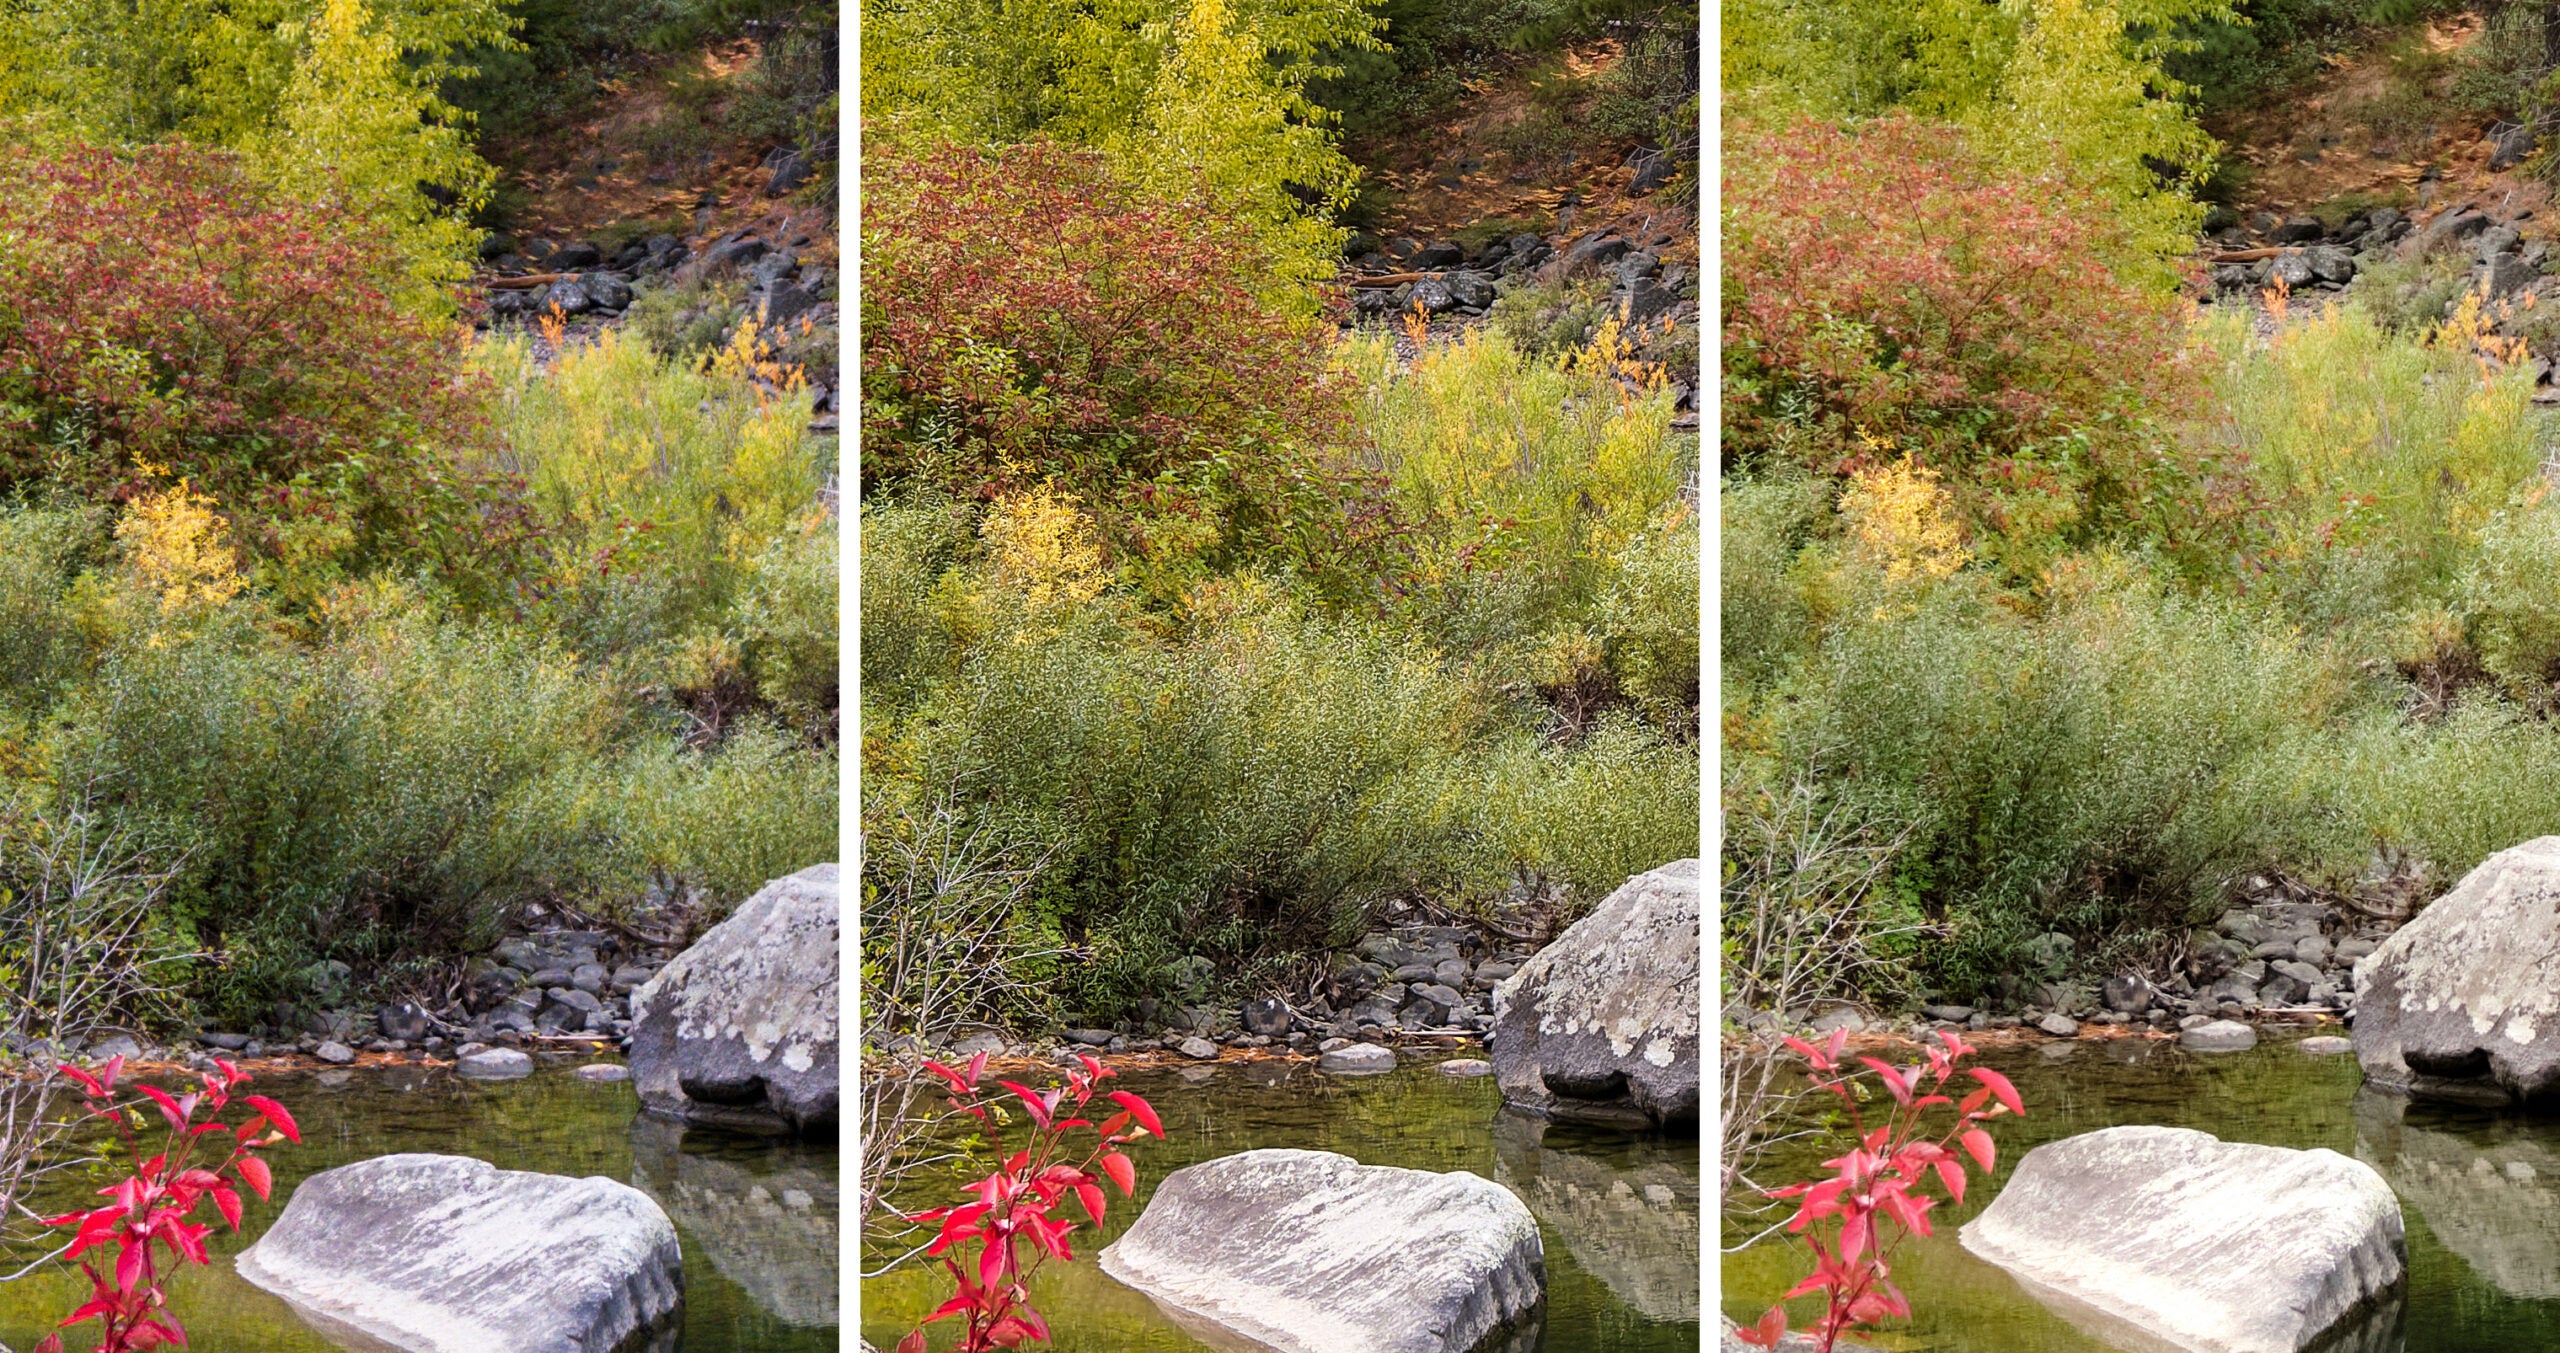
As a Fujifilm camera owner, I was also happy to hear that PureRAW 2 added support for Fujifilm’s X-Trans Raw files. Lightroom’s conversion can create a “wormy” appearance, particularly in textured areas. Shooting autumn foliage, for instance, often vexes me because, while the overall image looks good, at 100% magnification and closer the pattern is pretty obvious.
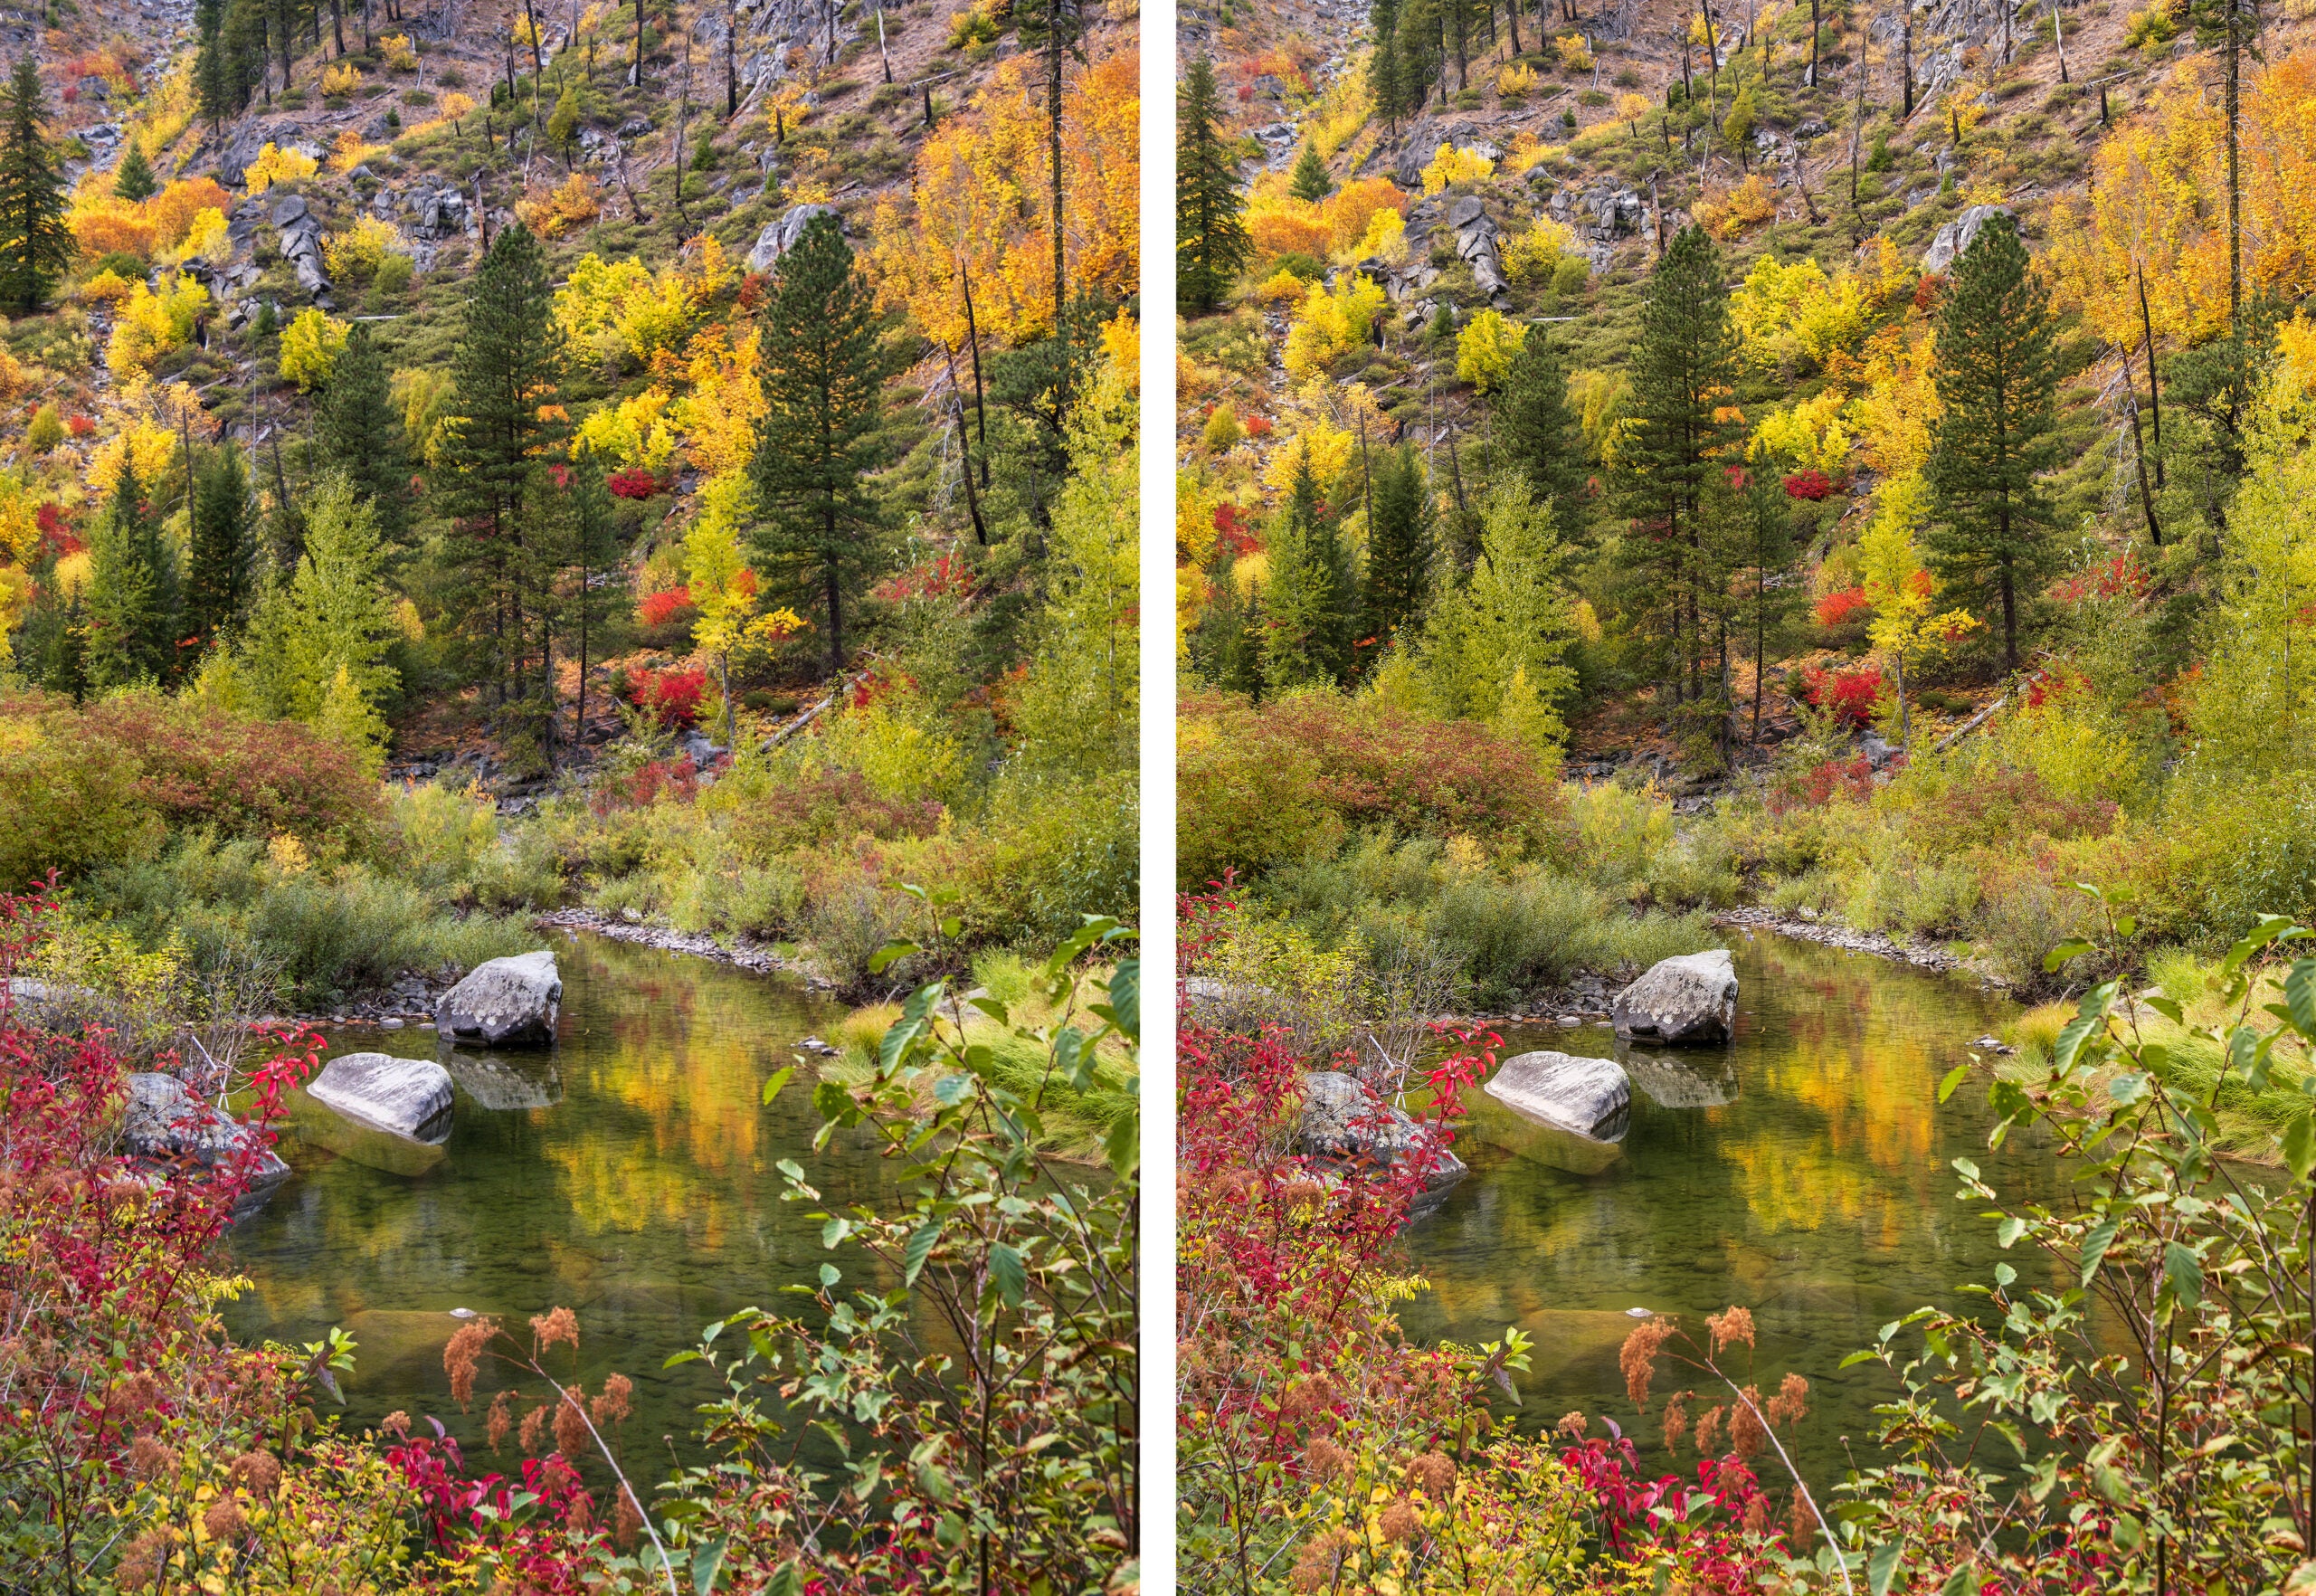
Lightroom includes its own machine-learning-based feature to reprocess Raw files (in the Develop module, choose Photo > Enhance), which improves on the default appearance, but to my eye, the PureRAW version looks better, if a little over-sharpened when viewed magnified.
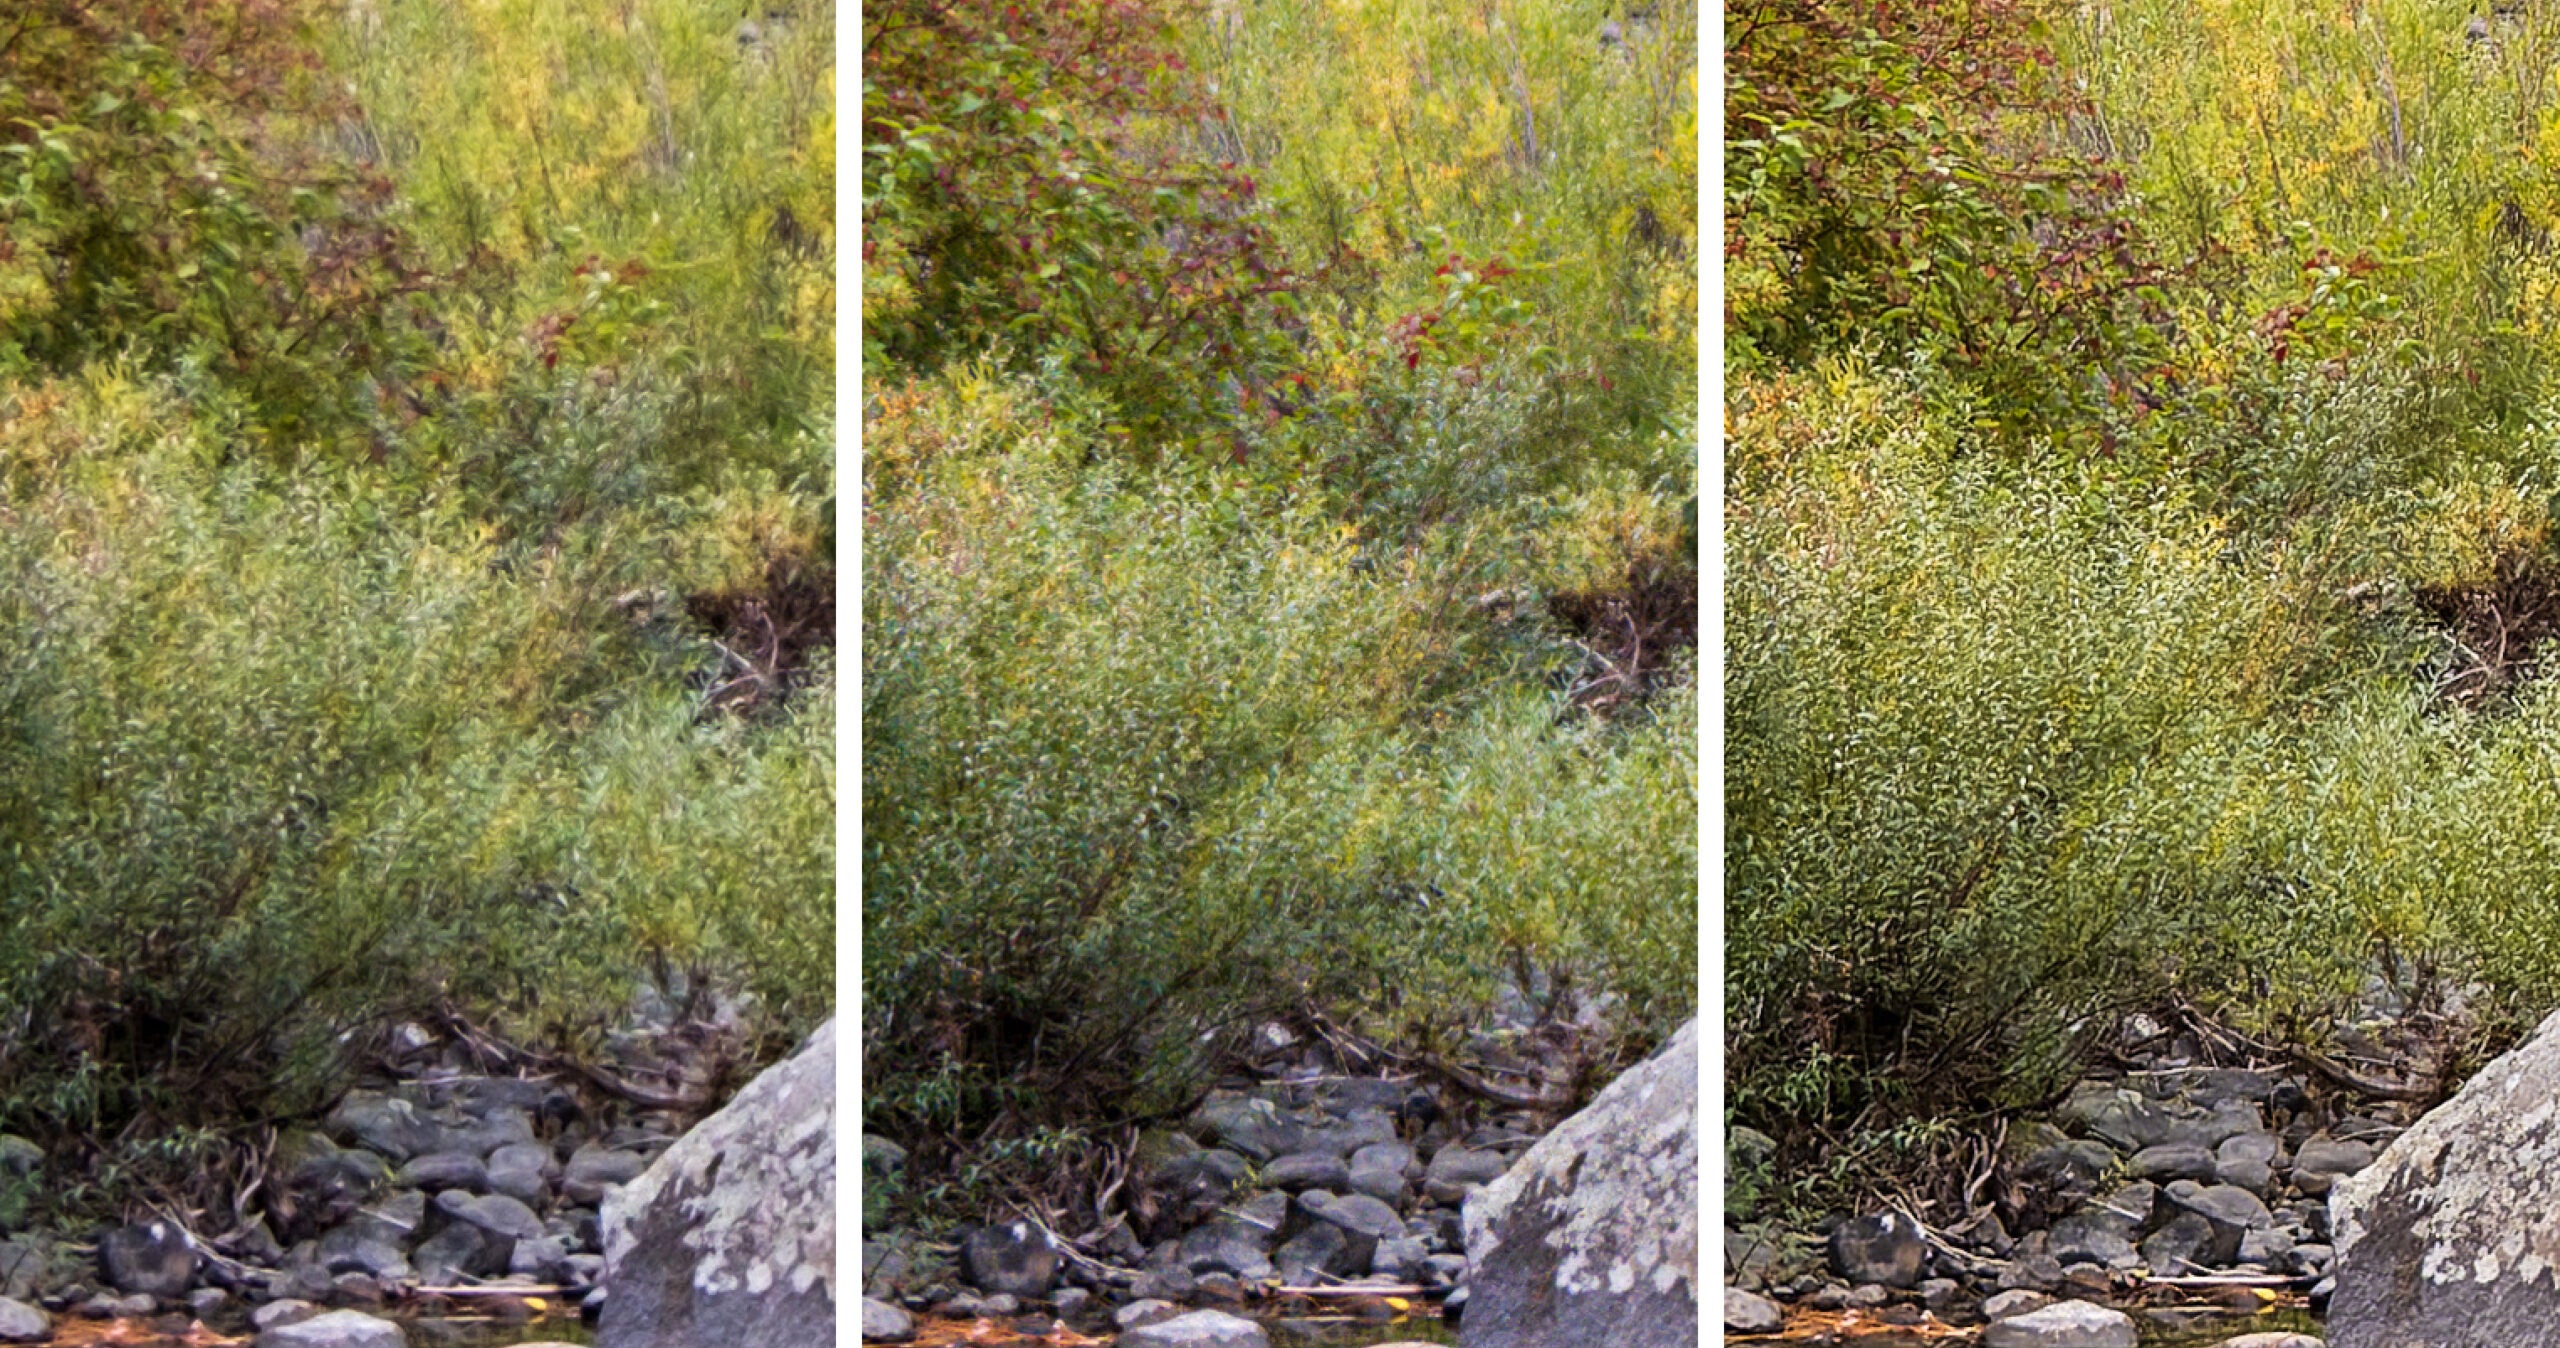
I also ran the same image through Capture One 22, because it tends to handle Fujifilm Raw files well. The image is an improvement over Lightroom, but I still prefer the PureRAW output.
Final thoughts
Since PureRAW is dealing just with the Raw translation stage, you can process images regardless of which app you prefer to edit in. In my Lightroom Classic examples, I ran PureRAW as a plug-in, which creates a new image saved to my Lightroom library. You can alternately run PureRAW 2 as a standalone app, process your files, and then import the resulting DNG images into your app of choice or edit them singularly.
One final note: DxO PureRAW 2 works with just about any Raw image available, with one notable exception, Apple ProRAW files. That’s because ProRAW images, while sharing many of the editable characteristics of Raw files such as greater dynamic range, are already demosaiced when they’re saved.
The post Preprocess Raws files with machine learning for cleaner-looking photos appeared first on Popular Photography.