You don’t need a brand new iPhone 14 Pro to shoot in Raw – as long as you have an iPhone made in the last eight years (at least an iPhone 6s, 6s Plus, or SE, all of which came out in 2014), or newer, you can use Lightroom’s awesome built-in camera to shoot in RAW mode (It was IOS 10 that let 3rd party apps like Lightroom on your iPhone shoot in Raw, even though Apple’s own Camera app didn’t include that option). Here’s how to turn it on:

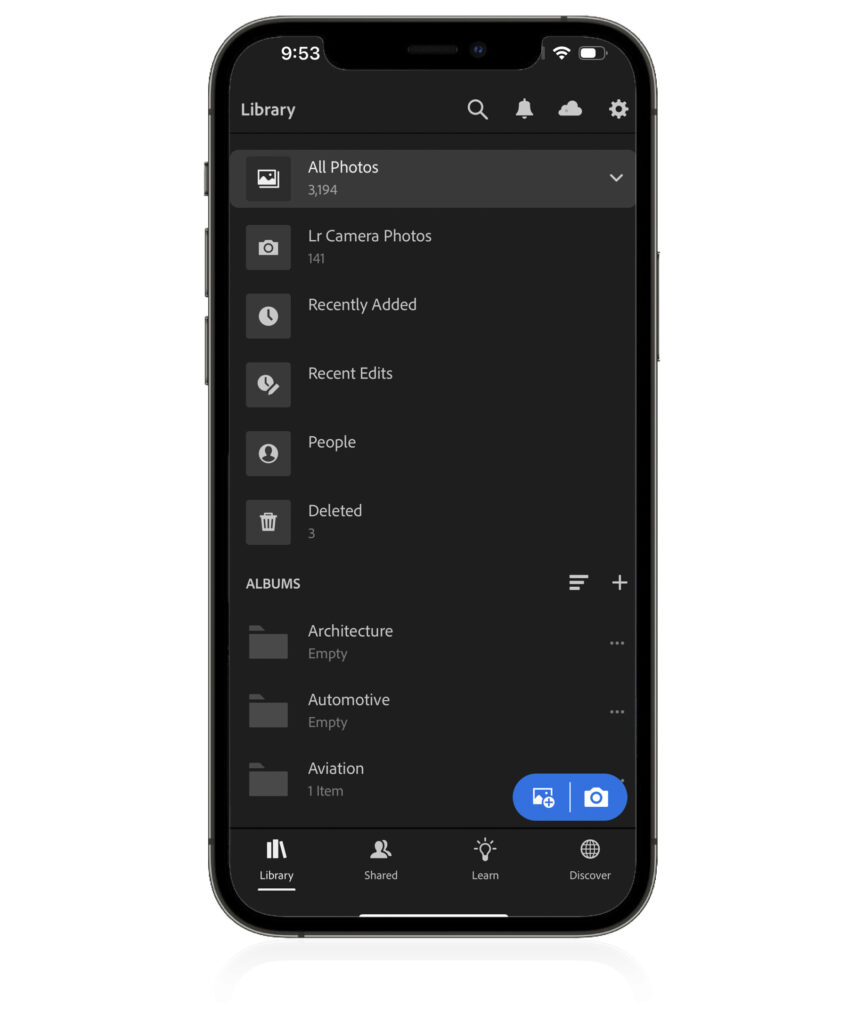
STEP ONE: Launch Lightroom on your iPhone, and at the bottom of the main street, down at the bottom in the blue pill shape; click on the Camera icon to bring up the Camera app.

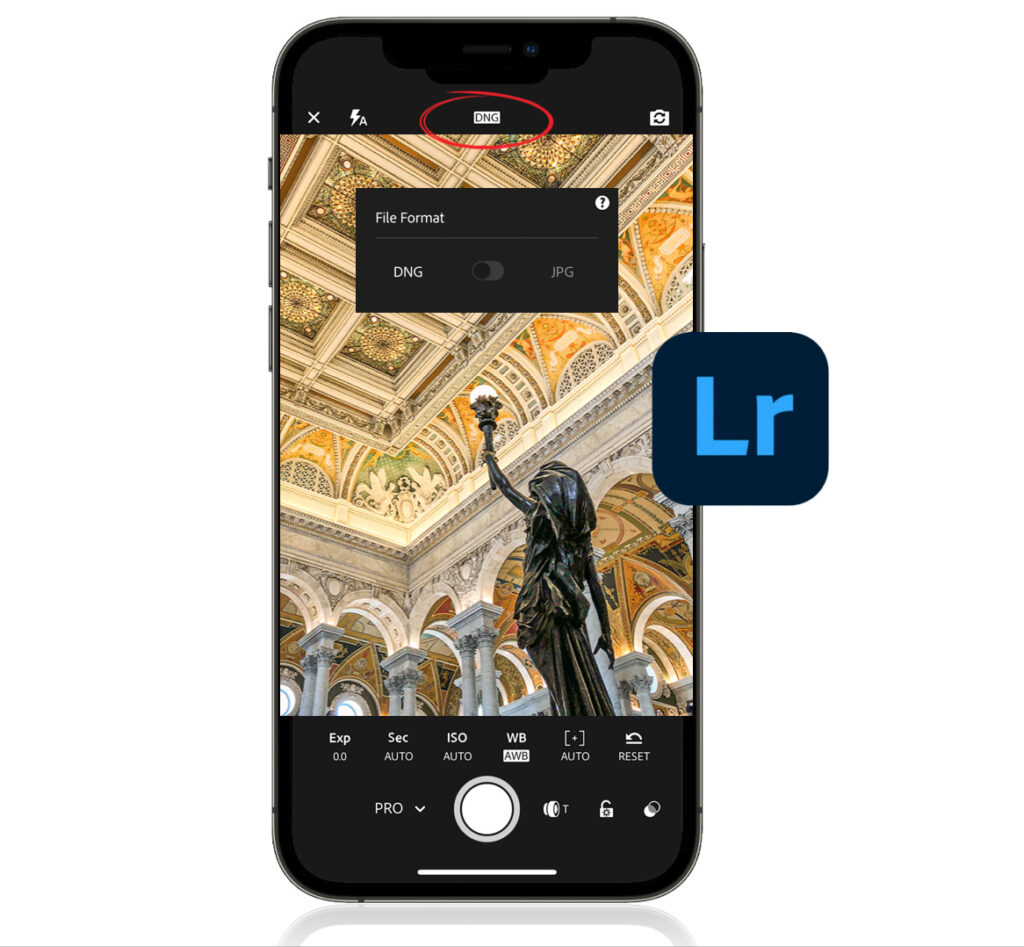
STEP TWO: Up at the top center of the screen, it shows the file format you’re shooting in (shown circled above in red) – either JPG (jpeg) or DNG (Adobe’s RAW format). Tap on the name, and a pop-up screen appears where you can choose which mode you want to shoot in. If you want to shoot in RAW, choose DNG. That’s it.
Now, when you shoot with Lightroom’s camera, those raw images will appear right within Lightroom, ready for you to edit on your Phone.
Have a great weekend, everybody! The Bucs are on a Bye week, but Bama is playing (it’s an out-of-conference game we should win fairly easily), so it should be a great weekend! Have fun! #rolltide!
-Scott
The post Shoot in Raw on any iPhone Using This Trick appeared first on Lightroom Killer Tips.
